Showing posts with label Straight From The Nest. Show all posts

Monday, January 28, 2013

YUM


Hello everyone! It's time for a new challenge at My Craft Spot! This week the challenge is "Wish Big" Create a birthday project.
I made this fun card to share with you! My Glossy Accents got a good work out on this one! LOL!
I cut the cupcake from Straight From The Nest and add glitter to the cherry and frosting. I stamped the face with a Peachy Keen stamp and added Glossy Accents to the eye, tongue and dotted the chocolate layer. 
The banner was made using My Craft Spot's Lacy Banners and Chunky Alphabet stamp set. I wove some twine through the pieces and added bows to the end. 
To finish I stamped the sentiment from My Craft Spot's Inside and Out Set #2 and glossy accent dots to the entire card. 
I hope you will all play along and please don't forget to check out what the rest of the DT has created! 
Have a great day!
SUPPLIES
Cricut- Straight From The Nest

Thursday, November 15, 2012

Christmas In The Heart


Hello everyone! Today I have a card to share with you that I made using the New Joy To The World stamp set from My Craft Spot!
I have to admit that I totally scraplifted this card! The design was so pretty and I knew this sentiment would be PERFECT for this card! The original card HERE was a stamped image card. I redid it using my Cricut!
The fence and light pole were cut from Mini Monsters and the birds from Straight From The Nest. I created the Holly branches and berries using punches. The branches were made using a snowflake punch that I cut into 3 sections then glued them onto the fence. For the berries, I used a small hole punch and added some black lines to the tops. The background I stamped the snowflakes using My Craft Spot's New Stampin' Around Christmas stamp set and cut a wavy piece for the snow. To finish I added some twine and jute and stamped the sentiment. 
Thanks for stopping in and have a great day!
SUPPLIES
Cricut- Mini Monsters and Straight From the Nest
Snowflake punch

Monday, November 5, 2012

Day 1 Of My Craft Spot's Stamp Release


Hello everyone! It's finally here!!! SNEAK PEEK WEEK for My Craft Spot's Stamp Release!!! This is day 1 of a week long PARTY!!! We will be showing you some awesome projects along with prizes everyday, followed by a blog hop on Saturday. So make sure you head to My Craft Spot to see what the prize is for EACH day and some fabulous inspiration from the DT.
Today we are showing sneak peeks of the new Chunky Alphabet stamp set and the Lacy Banners Metal Dies.
I love to make cards with non-traditional colors and this one is a fabulous example! That cute penguin looks great on a pink background...lol!
I cut the penguin from Straight From The Nest. This cut is actually part of a phrase cut...one of those hidden jems. I stamped the face with a Peachy Keen face stamp and did a white ink line around him. The mittens were cut from Jolly Holidays and I attatched them with some Blueberry Twine. 
I created the banner using the new Lacy Banner Dies and stamped each element. The "I" and the "heart" are from the new Chunky Alphabet and the snowflake is an extra sneak peek from another set. I pop dotted them in the center and added some twine to the top. I also added some twine bows to some buttons and added them to the corners. To finish I added Glossy Accents to the centers of the banner. 
Thanks for stopping in today and don't forget to head over to My Craft Spot for more sneak peeks, wonderful inspiration and the prize for today! See you tomorrow for day 2!
SUPPLIES
My Craft Spot- Chunky Alphabet stamp set and Lacy Banners Metal Dies, Strawberry Cupcake and Blueberry Trendy Twine
Peachy Keen- Happy Lashes
Cricut- Straight From The Nest and Jolly Holidays

Saturday, September 8, 2012

My Craft Spot Stamp Fall Release Blog Hop

If you click on the above picture, you can see it a lot bigger.


Hello everyone! IT's FINALLY the day you get to see the full reveal of the new stamps! If you came from My Craft Spot, you're in the right place. If not you will want to start at the beginning at My Craft Spot so you won't miss a thing! You can also see all the new stamp sets there too!
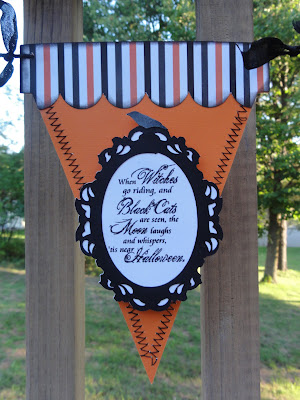
I made this awesome Halloween banner using the new Tiny Doilies Dies, Stampin' Around Fall, and the Spooky Treats Stamp sets for my project.
The banners were cut from Straight From The Nest at 7 inches. I used my sewing machine and sewed a zig zag stitch along the sides of the orange banners. I cut the witch's head out of chunky glitter paper from Happy Haunting. For the center banner I cut the frame from Happy Haunting and used my Gypsy to make it a little wider to accommodate the sentiment. I stamped that awesome sentiment from the Spooky Treats stamp set.
NOW, for the layered ornaments.....I saw something like this on Pinterest and LOVED it. Theirs (can be seen HERE) was made using Stampin' Up stamps and dies, and I set out to re-create one using my Cricut! This is a very time consuming project, but so worth it! I will give you a list of the cuts and quantity and then tell you how to assemble it.
Simply Charmed ornament- 15 at 2 1/2 inches out of white (cut off hanger) for each ornament- 30 total for 2 ornaments
Jolly Holidays- 15 at 2 inches out of black and white poka dot for each ornament- 30 total for 2 ornaments
Here is a cut out sheet for you to see as reference
I chose to stamp my orange and white ones, but you can easily do this with just pattern paper.
Fold all ornaments in half length wise. Assemble each petal by gluing 3 ornaments together. Here's what they will look like
When you get all of your petals assembled, you will glue them to the outside of a 3 inch circle
(these are shown is reverse colors)
Next you will cut a 1 1/4 X 12 inch strip of paper and score every 1/4 inch till the 12 inch end. Then fold back and forth on each other to create the pleated fold for the rosette center. Glue ends together and ink edges in black. Then glue rosette to a 1 inch circle. For the center of the rosette I used My Craft Spot's new Tiny Doilies Dies and layered them on top of each other. I stamped the center die with the pumpkin stamp from the Stampin' Around Fall stamp set and did a black stitching line. I glued them to the top of the rosette and pop dotted the rosette to the center of the circle using 3 pop dots layered on top of each other.
I thread all the banner pieces onto black yarn and tied Marmalade and Midnight Black crinkle ribbon in between each banner.

Now for the BEST part! Each one of us is giving away 1 one the new stamp sets! All you have to do is leave a comment on all the blogs through the hop, and that will give you a total of 9 chances!
 I am giving away the Tiny Doilies Dies!

Just leave a comment and you will be entered to win. We will announce all the winners on Monday September 10.
Now you're off to the very talented Robin!
Here is the hop order in case you get lost
Kimberly
GiGi  -You're Here!
Robin
Kate
Amber
Heather
Gwen
Ally 
Marlene
Have a great weekend and thanks for hopping along with us!

Thursday, May 10, 2012

Crazy Ribbon Cupcake Card


Hello everyone! I have a fun card to show you today that I did for My Creative Time's Throwback Thursday challenge. The challenge is to make a birthday card using a cart that has balloons, cakes, party hats, cupcakes, etc. I used Straight From The Nest. I never realized until I really looked at it, just how many birthday cuts are on there. 
I made the card shape using Accent Essentials by welding to rectangles together and then adding the scallop borders. The background is embossed with Seeing Spots and I added diamond glitter dots to the scallops. The cupcake was cut from Straight From The Nest and I added lots of fun things to it. I didn't use the wrapper, but instead cut strips of paper and added twine to it. For the top I added Glossy Accents to the cherry and diamond glitter for the sprinkles. I also added that cool fringe and more diamond glitter to the bottom of the frosting. The banner I cut by hand, I stamped the letters, and used a white pen for the inside lines. I added more of that fun trim and wound twine around it. The mini tag was stamped and cut by hand and I added that amazing bow! How fun is that bow?! I found an awesome tutorial for it HERE.
I finished the inside by stamping the sentiments and cherry which are from Peachy Keen's With A Cherry On Top stamp set. I colored the cherry with Copic markers.
I hope you all like my card and thanks for looking! I hope you will come back on Monday because I have some super exciting news to share with all of you!  Have a great weekend!

Friday, March 9, 2012

Happy Bird


Happy Friday everyone! I have a card to show you today that I did for a couple of challenges.
I printed and cut this card using my Imagine and CCR. The patterns and colors are from the Imagine Blossom cart. This is my new FAVORITE way to create cards! One sheet of white cardstock, one time cutting, and that's it!
The scallop circle and mats were cut using Cricut Craft Room Basics and I stamped the white inner piece with a stamp from Heart Elements Nestability stamp set. The bird and flowered branch was cut from Straight From The Nest and I stamped the face with a Peachy Keen Cornies face stamp. For the branch I cut 2 and trimmed down the one side to fit around the mat. I also added a rectangle piece to the bottom one to extend it out the width of the card. I colored the centers of the flowers with a white pen and used hole punches for the berries. The butterfly was cut from Indie Art and I embossed the background with Stylized Flowers Cuttlebug folder. To finish I stamped the sentiment which is from Whimsical Designs Whimsical Fun Vol. 1.
I am going to enter this card into the following challenges:
1. My Craft Spot- "For The Birds"
2. Die Cuttin Diva's- Sketch
3. Paper Playtime- Delicious Die Cut Creations With Flowers

Monday, November 7, 2011

Scraptastic Designs Challenge #1!


Hello everyone! It's FINALLY here! The first challenge at Scraptastic Designs! This week the challenge is to decorate a gift bag or box and it must include a tag, stitching, and a button with a Thanksgiving theme.
For my project I decorated a pre-made gable box that I got from Annie's Paper Boutique. I used Cindy's digi Little Pilgrim Boy and colored it with colored pencils. I added Glossy Accents to the turkey, the buckle on his hat, and his eyes. I cut him out and mounted him to a matted frame that I cut from Once Upon A Princess. I made a belly band for the front of the box and added a piece of paper for the top. I cut the leaf tag from Straight From The Nest and added a button with a twine bow. I attatched it to strips of crinkle ribbon that I tied to the handle of the box.
I hope you all liked my project and will check out what the rest of the amazing DT has made for your inspiration. I can't wait to see what you will create! Have a great day!

Wednesday, September 14, 2011

Just Because


Hello everyone! It's time for a new challenge at Whimsical Wednesdays! This week the challenge is to make a "Just Because" project. Make something for someone to let them know that you are thinking of them and it must include a digital image or sentiment.
This week we are working with Bugaboo stamps. Can anyone say CUTE!!! Not only is the DT working with them this week, but the prize for this challenge is a Gift Card for $21 to Bugaboo Stamps for the equivilant of 7 DIGI STAMPS! How fun is that!
I chose this super cute turtle and ladybug image to work with. I don't usually work with digi's so it took me awhile to figure out my coloring. I only own like 10 Copics and didn't like how my colors worked so I chose to do mine with a combination of chalk, colored pencils, and a copic marker for the ladybugs face.
I started by sizing and printing my image from my computer. I used green chalk and chalked the entire turtle. I then went over it around the outside and lines with a darker green colored pencil and the used the chalk to blend it all back together. I did the same for the ladybug except for the face which I used the Copic marker on. To add my light  highlights, after it was all done I took an eraser and lighly erased away the light spots. I cut the scallop frame and mat from Straight From The Nest. The ladybugs on the side are rub-ons that I scattered and then using a black pen, I did the dotted line. The bottom of the card I punched a border strip and added a piece of co-ordinating paper to the center, punched the sentiment tag with Fiskars punches and stamped the sentiment.
I hope you all like my card and will play along this week at Whimsical Wednesdays! Please don't forget to check out the other fabulous designers work. Including in that we have 2 GUEST DESIGNERS from the Bugaboo DT!And for even more inspiration please check out the Bugaboo Blog, Catch The Bug Challenge Blog. I can't wait to see what you'll create!

Sunday, August 28, 2011

Birthday Wishes


Hello everyone! Here is the card that I made for a couple of challenges! The first is Scrappy Mom's Terrific Tuesday challenge which was to use Straight From The Nest. The second is for Tattered Time's CCCC challenge which is Birthday Cakes or something similar. I don't own BC but I saw an image that was close to this bird.
I cut the card base and layers from Straight From The Nest. I embossed the white circle with the Cuttlebug Spots and Dots folder and added a white stitching line around the outside of the card. The bird was also cut from SFTN and I stamped the face with Peach Keens Everyday Character Face stamps. The balloons were cut from Create A Critter and I tied a twine bow and added twine for the string. The sentiment tag I cut by hand and stamped the sentiment with a Stamp'n Up stamp. To finish I added Glossy Accents to the balloons, the pom on the hat, the eyes and the beak.
I hope you all had a great weekend and thanks for looking! Take Care!

Friday, May 6, 2011

Baby Boy Banner


Hello everyone! This is the banner that I made for Peachy Keens LFIF challenge. The challenge is to make a banner or something with a banner and include a Peachy Keen face stamp. I started by cutting the pennants from Birthday Bash at 4 inches. The letters were also cut from Birthday Bash at 1.5 inches. The scallop frame for the letters were cut from Straight From The Nest at 2 inches. The bear at 2.5 inches, the monkey at 3 inches, and the frog at 2 inches were cut from Create A Critter. The turtle was cut at 4 inches from Life's A Beach. I stamped the faces on the monkey and bear and the frogs eyes which I used the owl eyes and omitted the eyelashes. All the paper was from DCWV Baby Boy Stack. Hopefully my brothers wife has a boy now so I can actually use this! I hope you all liked my banner and thanks for looking!


Thursday, March 31, 2011

Challenge Card


Hello everyone! Here is the card that I did for several challenges. I cut the card and frames from Forever Young. I welded 2 frames together in my Gypsy for the card. I cut the bird and branch from Straight From The Nest at 1.5 inches each. I stamped the eye using one of my Peachy Keen stamps and also stamped the sentiment. I hope you all enjoyed my card and have a great day!

I am entering this card into the following challenges:

Getting Cricky's Simple Sunday Challenge- For the Birds, include a bird

Fantabulous Cricut #53- Looks Like Spring

Scrapbookaholic By Abby #2- Anything Spring

Monday, February 21, 2011

Fantabulous Cricut #48 Emboss It


Hi everyone! Here is the card that I made for Fantabulous Cricuts challenge this week. The challenge is embossing. I cut this butterfly from Straight From The Nest at 2.5 inches. I Fun Flocked the middle layer to give it that look. The backround I embossed with the Textile Cuttlebug embossing folder and went over it with blue ink to highlight it. To finish I tied a ribbon and stamped the sentiment. I hope to have 1 more post before I leave for vacation tomorrow! Take care everyone!


Saturday, January 29, 2011

Tweethearts!


Hi everyone! How cute is this card? These would make the cutest Valentines for kids to hand out. For my card I did a Treat Box Card. I found the tutorial HERE with the printable template...although the template is NOT accurate. You still have to follow the directions from the tutorial. And DON'T forget to add the acetate BEFORE you assemble the box....like I did the first time around! LOL! I didn't have the punch they called for so I just cut a rectangle using an Xacto knife and ruler and I filled the box with some M&M's. For the card part I cut the branch (pg.43) and birds (pg.28) from Straight From The Nest and glued on hearts to the tree branch's cut from George to the flowers. The Tweethearts (pg.71) was also cut from SFTN but I welded the S from Once Upon A Princess. I added the bowtie and flower to the birds and those are from Create A Critter. To finish the inside of the card I cut a frame from Storybook and stamped the sentiment. I am going to enter this into Card Creations & More By C's So Saturday Challenge #2 which is anything Valentine related. Have a great night everyone!

Sunday, January 16, 2011

Jitterbuggin' For The Birds


Hello everyone! Here is the card I did for Jitterbuggin's weekly challenge. The challenge is to use the sketch, a bird, and something pink. I cut the frames from Straight From The Nest at 4 inches and 2 inches with the layers being a tad bit bigger. I embossed the white layer with the Sizzix Flower Vine folder. I cut the birdcage from Four Legged Friends at 3.5 inches and the bird at 1.5 inches. To finish the card I stamped the sentiment and punched the border. And finally my pink in the card is at the top of the birdcage....I added a pink gem to it. I hope you all are having a great day!