Friday, December 30, 2011

Friends Like You....


Happy Friday everyone! Do you all have fun plans for New Years? I am going to enjoy a nice dinner and movie with my hubby. I just recieved my order from Peachy Keen and wanted to play with my new faces. I also got Meow for X-mas and wanted to play with that too. So this is the card that I made.
I cut the card base and mats from Birthday Bash at 5 inches. The grass was cut from Paper Doll Dress Up at 1 inch and I trimmed it aroud the circle mat. The kitty with the bird on his head was cut from Meow at 3.5 inches. I stamped the kitty's face with Peachy Keens Sampler Package of Faces using Misty Sue. For the birds eye, I used Peachy Keens Cornies faces. To finish I stamped that wonderful sentiment which is from Whimsical Designs Whimsical Fun Vol. 1.
I hope you all have a fun and safe weekend! Happy New Year!

Wednesday, December 28, 2011

Whimsical Wednesdays "Happy New Year's" Challenge


Hello everyone! It's time for a new Whimsical Wednesdays challenge. This week the challenge is to create something for the New Year or add a link to your favorite project you've made this last year.
I made this card to celebrate the New Year. I cut the bottle and glasses from Simply Charmed and used my Gypsy to hide the faces. Instead of cutting the super small confetti pieces I added gold stickles. The 2012 was cut from Robots and I embossed the background with the Cuttlebug Seeing Spots folder. To finish I added a bow and stamped the sentiment which is from Whimsical Designs Everyday Sentiments stamp set.
I hope you all will play along and please don't forget to check out what the rest of the Design Team has made!

Monday, December 26, 2011

Snow Angel


Hello everyone! I hope you all had a wonderful Christmas! Now that Christmas is over I can get back to my blog!
I made this card to enter into Peachy Keens Designers Choice challenge. I cut the girl from Winter Frolic at 3.5 inches and stamped her face with a Peachy Keen Everyday Character face stamp. The circle sentiment is a combination of the snowflake stamp and sentiment stamp from Whimsical Designs Snow Much Fun stamp set. I mounted the sentiment to my acrylic block rounded and stamped it on the top and bottom. Then I stamped the snowflake in the center. I punched out the circle with a punch and mounted it to a Nestabilities Lacey Cricle die. To finish I mounted the circle on a pop dot and added a bow.
I hope you all liked my card and thanks for looking! Have a great day!

Wednesday, December 21, 2011

Whimsical Wednesdays "Home For The Holidays" Challenge


Hello everyone! It's time for a new Whimsical Wednesday challenge at Whimsical Designs! This time the challenge is "Home For The Holiday". Create a Christmas/Winter or New Years Home Decor project. Our own Nanne of Nannes Creations is sponsoring this challenge with Webster Pages Scrapping Supplies.
For my project I made this Christmas Tree ornament. I made a rosette for the base by cutting 2 2X11 inch strips of paper and scoring them at 1/2 inch intervals. I glued the 2 pieces together, folded back and forth on the scored lines, and it made this beautiful pleated base.  I then used my Imagine and printed and cut the snowflake design from pg. 19 in Snow Angel at 4 inches. I used pop dots and layered each image. The cute center snowflake is from Whimsical Designs Snow Much Fun stamp set. I stamped it in red and then cut it out and glue it to the center. To finsih I punched a hole in the top and tied a loop for the hanger and added a bow.
I hope you all will play along this week and don't forget to check out what the rest of the amazing Design Team has created! Have a wonderful day!

Tuesday, December 20, 2011

Enjoy The Magic Of The Moment


Hello everyone! Can you believe Christmas is only 5 days away! In celebration of Christmas, I made this tag. Sometimes I forget the true meaning of Christmas, and to me this tag a wonderful reminder. The birth of Jesus.
I cut the tag and mat from Tags, Bags, Boxes, and More at 4 inches. The baby and star were cut from Winter Frolic. I embossed the manger with a Mesh Texture folder and inked all the edges of the cuts. I used a black pen to draw in the eyes and nose. I added chalk to the cheeks and I pop dotted the head. The star front I covered with chunky glitter and pop dotted it to the star base. The sentiment is from Whimsical Designs Whimsical Fun Vol. 1. I thought this was the PERFECT sentiment! Enjoy the magic of the moment... of Christmas. I stamped the sentiment, tore the paper, and inked the edges. To finish I added a crinkle ribbon hanger and bow.
I hope you all have a WONDERFUL day and thanks for visiting.
I am going to enter this into the following challenges:
1. My Craft Spots Monday Challenge- Tag...You're It
2. Fantabulous Cricut- Trimming with a tag
3. Whimsical Designs- Tags
EDIT: People have been asking about the paper I used. It's from DCWV Christmas Combo stack that I bought last year.

Monday, December 19, 2011

Scraptastic Mondays


It is with a sad heart to say that this will be my last DT post for Scraptastic Mondays. Cindy has decided not to do challenges anymore. I want to thank Cindy for having me on her DT and for being such a wonderful person to work with. It was a GREAT experience for me and it got me into a whole new field of paper crafting, creating with digi's. With that being said, here is my project:
I made this fun gift card holder. I used Cindy's X-mas Girl With Banner digi. Isn't she ADORABLE! I colored her with Copics and added stickles to her hat and pom. I stamped the sentiment in the banner using a stamp from Whimsical Designs Snow Much Fun stamp set and added a thin layer of stickles over the top to give it some sparkle. I created the gift card holder around this digi. I can give you the basics of how I did this, but I will not be able to give you exact directions. I started by cutting a 4.5 X 11 inch piece of cardstock. I glued down the digi at the top center leaving enough room to trim around it. I placed my gift card under the digi and used a pencil to draw where I wanted the fold and the top of the card. I then placed my glue bottle in the center top and traced around it to get the tab to close it and cut it out. I cut slits in the corners for the gift card and cut around the underneath of the banner for the tab to fit into to close it. I made the front by cutting a piece of cardstock 1/8 inch smaller and stamped it with a snowflake stamp from Whimsical Designs So Much Fun stamp set and added stickle dots to it. I added ribbon to it and glued it down. I added a bow and a tag that I cut and wrote from hand.
I hope you all liked my project and thanks for looking! Please don't forget to check out what the rest of the amazing DT had created. Have a great day!
I am entering this into Robins Creative Cottage linky party.

Friday, December 16, 2011

Reindeer Crossing


Happy Friday everyone! Here is a fun card that I made for a couple of challenges.
I made the card base by welding 2 tags together from Winter Frolic and cut the co-ordinating mats. I inked around all the edges and used a black pen for the dash line on the red and a gold pen for the dotted line on the white. The reindeer were cut from Christmas Cheer and I inked them and used a black pen to highlight their faces, their hooves, and noses. Thats ALOT easier than trying to cut and glue such little pieces. The tree were cut from a border in Winter Frolic and I added clear glitter glue to them. The sentiment is from Whimsical Designs Snow Much Fun stamp set. I stamped it in red and embossed it with clear. The holly leaves were from a punch that I inked and added the clear glitter glue to them also. I am going to enter this into the following challenges:
1. My Craft Spots Monday challenge- Make a shape card
2. More Than Favors Wacky Wednesday- Christmas
3. BBTB2- Winter Frolic Tag

Thursday, December 15, 2011

French Fry Gift Box


Hello everyone! I wanted to show some cute french fry boxe's that I made up for my girlfriends. I can't believe Christmas is only 10 days away! EEK!
I found a printable template on the internet for the french fry box and cut them out of decorative paper. I made the tags using Whimsical Designs Snow Much Fun stamp set for the semtiments. The square one I cut by hand and the oval one is a fiskars punch. I wrapped ribbon around the box's and added the tags. I packaged socks for the blue and gloves for the red, a chocolate bar, and a hand sanitizer in clear wrap and tied closed with ribbons. These are so much fun to make and I am sure my girlfriends are going to LOVE them.
I am going to enter these into Robins Creative Cottage RCC challenge #2- Holiday Treat Packaging
Thanks for looking and have a wonderful day!

Monday, December 12, 2011

Celebrate The Occasion Christmas No Red Challenge


Hello everyone! It's time for a new challenge at Celebrate The Occasion! This time the challenge is to create a Christmas project but you CAN'T use RED. Right now CTO is holding a Design Team Call. If you are interested, please head over there and check out how you can apply.
I made this fun "jingling" card. I cut the stocking from Jolly holidays at 4 inches. I inked around the edges and mounted it on pop dots. I tied a ribbon to the card and added some twine to the top. I strung on a bell before I glued it down and added a bow out of the white ribbon and also the twine. This card is so much fun because it "jingles" when you touch it. To finish I stamped the sentiment 3 times which comes from Whimsical Designs Snow Much Fun stamp set. I just love the cute sparkles on this sentiment!
I hope you all will play along this week and don't forget to check out what the rest of the fabulous DT has made. Have a GREAT DAY!
I am going to enter this into Simply Crafts Challenge- Use a stocking cut from Jolly Holiday

Friday, December 9, 2011

Hot Chocolate Gift Package


 This is what it looks like from the top when it's shut.
Hello everyone! Here is a Hot Chocolate Gift Package that I made. I thought these would be a fun gift to give to teachers, co-workers, etc.
I started by making the package folder. I did this by using an 8.5 X 10 inch piece of cardstock. I used my Martha Stewart Score Board and with the 10 inch side up, I scored it at 1/2, 4 3/4, 5 1/4, and 9 1/2. I then turned it with the 8.5 inch side up and scored it at 3 inches. Fold in the 1/2 and 9 1/2 inch sides and glue down. Then fold the 3 inch side up and glue to the sides and the middle. Now you have a folder. I cut the mouse from Birthday Bash and stamped the face with a Peachy Keen Wide Eyed and Bushy Tailed face stamp. I colored in the face and added Glossy Accents to the eyes and boots. For the scarf, I cut it by hand out of metalic paper and added a twine bow to her ear. The cup she's holding and the Cocoa sentiment are stamps from Whimsical Designs Snow Much Fun set. I colored the cup with Copics and added Glossy Accents to this as well. To finish the front I cut a mat and embossed it with the Cuttlebug Seeing Spots folder and added a 1 X 10 inch strip of paper around the center. I then added ribbon to the top of the strip to be able to tie it shut. To finish, I added a packet of Hot Chocolate, candy cane, and a bag of marshmallows to the inside pockets. I hope you all like my project and thanks for looking! Have a great day!
I am going to enter this into the following challenges:
1. Fantabulous Cricut- Present Time: Make a gift, gift packaging, or use a gift cut
2. My Craft Spot- Christmas Treats and Gift Packaging

Wednesday, December 7, 2011

Whimsical Wednesdays "Winter Fun" and A Winner!


Hello everyone! It's time for a new Whimsical Wednesdays Challenge at Whimsical Designs. This time the challenge is to create a Christmas/Winter themed project and it must include "Sparkles". This can be by adding stickles, glimmer mist, glitter, etc, or you can include a premade glittery embellishment. Our very own Nanne is sponsoring this challenge with Websters Scrapbook supplies. And our own Cindy is giving 3 digital stamps. You can see her beautiful digi's HERE.
For my project I made this card. I cut the snowman from Jolly Holidays and stamped the face with a Peachy Keen Winter Wonderland Face stamp. I used a black and white pen for the highlights and a silver marker to color in the bottom of the skates. I punched some snowflakes and "glittered" them up. I did this by putting them through my Xron Sticker Maker and covered the sticky side with glitter. I did the same thing for the ice at the bottom. I added a gem to the center of the big snowflake and stamped the sentiment which is from Whimsical Designs Snow Much Fun stamp set. This set is for sale now in the Whimsical Designs Shop. Don't you just love that saying!?! To finish I tied a bow and pop dotted the snowman to the card.
I hope you all will play along this week and please don't forget to check out what the rest of the Whimsical Designers have created! Have a great day!

And the winner of my Whimsical Designs Stamp Release/500 Follower giveaway is......................... Random.org chose #8..............................................PAT N.
Congrats Pat! Please email me at booger1 at tds.net and I will get that in the mail for you! Thanks to all of you who are followers and leave the sweetest comments! You are THE BEST!

Monday, December 5, 2011

Scraptastic Mondays Challenge #5


Hello everyone! It's time for a new challenge at Scraptastic Mondays! This time the challenge is to create a card or project with a snowman or snowflake with a Winter Wonderland theme. Stephanie from Whimsical Desgins has generously donated her Snow Much Fun stamp set for the winner of this challenge. There will also be a second place winner picked at random for 3 of Cindy's AWESOME digis! Check them out in her store HERE.
I LOVE the way this card turned out! This is one of my FAVORITE of Cindy's digis. It's called Snowman With Wreath. I colored it with colored pencils and added Stickles to the leaves, mittens, and dots to the bow. I mounted it to a mat cut from Love You A Latte. The banner and font was cut from Birthday Bash and I added gems to the corners. I cut the snowflake from Winter Lace and added a gem to this as well. To finish I tied a bow and embossed the background with the Cuttlebug Snowflakes folder. I also finished the inside with matching paper and stamped the sentiment from Whimsical Designs Whimsical Fun Vol. 1 stamp set.
I hope you all like my card and please check out what the other amazingly talented DT has to show you. I can't wait to see what you will create! Have a great day!
Don't forget to leave a comment HERE for a chance to win Slumber Party for the Whimsical Design Stamp Release/500 Follower Giveaway!

Saturday, December 3, 2011

Whimsical Designs Stamp Release Blog Hop!

Hello everyone and welcome to the Whimsical Designs Stamp Release Blog Hop! If you came here from Stephanie then you are in the right place! If you just happened to come visit, then you will want to start at the begining at 
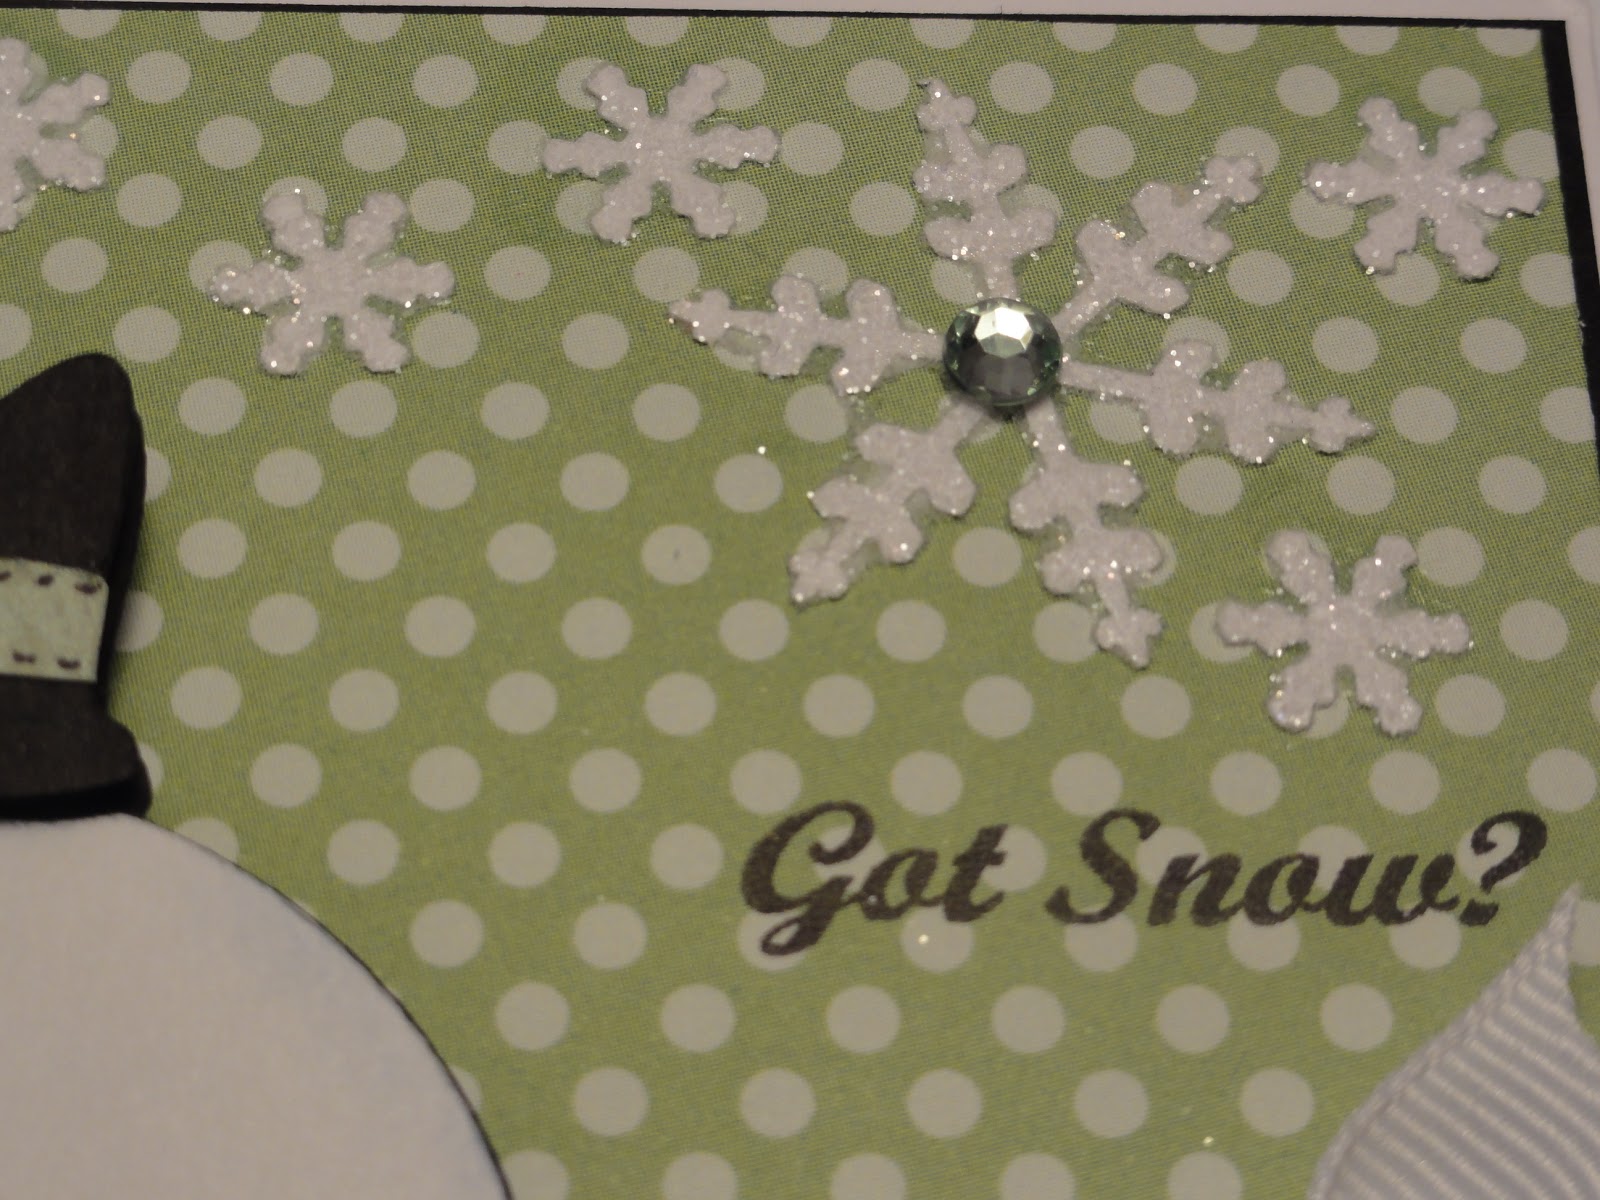
Whimsical Designs so you won't miss anything. Here is my project:


First off I have to tell you that these pictures do NOT do this card justice. No matter how hard I tried I could not get the pictures to show it's true beauty! :(   I cut the snowflakes from Winter Lace. The big one and it's layer was cut at 4 inches and the smaller one was cut at 1.35 inches. I pop dotted the big layer to the mat and layered the small snowflake on top and added a snowflake brad to the center. I embossed the background with the Cuttlebug Snowflakes folder and inked around the edges. The sentiment is stamped from Whimsical Designs Snow Much Fun set....isn't that a gorgeous sentiment? I also inked around the edges of the mat and pop dotted that to the card. I hope you liked my card and thanks for hopping with us today!
I'm sure you want to see the new stamps, so here they are!!! All of these wonderful sets are now for sale in the Whimsical Designs Shop!


These are such WONDERFUL stamps! They have such a great variety of sentiments and the fonts are ADORABLE! I can't tell you how impressed I am with them.

BLOG CANDY
Since I am SO excited for the new stamp release and I am almost at 500 followers, I am giving away

Please be a follower of my blog and leave a comment under this post. I will choose a winner on Tue. Dec. 6th and on Wednesday Dec. 7th, I will post it with my Whimsical Wednesdays DT post. I can only ship to the US...sorry.

GRAND PRIZE


One random winner will get a prize pack that will include One Whimsical Designs Stamp Set of their choice, two Stampin' Up ink pads (Black and Chocolate Chip), one medium sized acrylic stamp block from Stampin' Up and one pack of Stampin' Up White Card Stock. In order to be eligible for the grand prize they must become a follower of the Whimsical Designs blog and leave a comment on all the Whimsical Designers blogs under their hop post.

For extra chances to win the grand prize

1. Advertise the Whimsical Designs Blog Hop Stamp release on Facebook and go to the Whimsical Designs blog and leave a comment that you did

2. Blog about the Whimsical Designs Stamp Release Blog Hop and leave a comment at the Whimsical Designs Blog saying that you did.

You must include the links to the post in your comment.

 Your next stop is the wonderfully talented Cindy! Have a great day and have fun hopping!

Friday, December 2, 2011

Whimsical Designs Sneak Peek Day 2!

Hello everyone and welcome to day 2 of the Whimsical Designs Sneak Peek Week! In case you have not heard the news yet Stephanie of Whimsical Designs has a new line of stamps coming out. Today all of the Whimsical Designers will be giving you sneak peeks of the other 2 sets. The first 2 sets were shown yesterday. Tonight at 7:00pm EST is the stamp reveal blog hop. All stamps set's will be available for purchase on Stephanie's blog, in her new shop. Here is my project:
Blog Hop Changed to Tomorrow Morning


In order to give everyone more time to leave comments under the post for the two day stamp sneak peeks the blog hop will start tomorrow, December 3 at 7:00am EST. You have until 12:00am EST tonight to leave comments under all of the designers post for the sneak peeks from yesterday and today. All of the winners of the stamps will be announced, along with the winner of the entire stamp release, tomorrow morning on the Whimsical Designs Blog.


I made this gingerbread house gift box. I cut the box from Sweet Tooth Boxes at 8 inches. This included the cuts for the windows, door, sign, and roof. I added velum paper on the inside of the box to the windows and used a white gel pen to do the stripes on all the windows and the door. I cut strips of glitter white paper for the roof edges and a 12 inch strip for the snow at the bottom. The tree I made by cutting 3 equal triangles and folded them in half and glued them together to get the 3D tree. The sentiment on the sign and the candy canes were stamped from Whimsical Designs Snow Much Fun stamp set. I stamped the candy canes, colored them with copics and cut them out and glued them to the sides of the roof. The sign I cut out of black and also white to get the sign. I stamped the Candy Cane Lane and drew in the candy cane top and bottom and colored it with copics. I hope you like my project! I think is turned out so super cute!
BLOG CANDY TIME:

All of the designers will be giving away one stamp set for the sneak peek week. I am giving away Everyday Sentiments. In addition Stephanie is giving away the entire release to one person. That is a total of 11 prizes.
In order to be eligible for the prizes above you must leave a comment on all of the designers blogs on both sneak peek days.
Want Two Extra Chances to Win? Post about the two day Sneak Peek and the Stamp Release on

1. On Facebook -come back and leave a comment under the sneak peek post on Whimsical Designs saying that you did
2. On Your Blog-come back and leave a comment on Whimsical Designs saying that you did.

You will have until Friday December 2 at 12am EST to leave a comment on the blogs. All winners will be announced during the Stamp Release blog hop tomorrow at 7 am EST.
 Please head back to Whimsical Designs to check out what the rest of the amazing Desgin Team has created! Have a great day and see you back tomorrow morning for the Stamp Release Blog Hop!

Thursday, December 1, 2011

Whimsical Stamps Sneak Peek!!!

Hello everyone! Welcome to the Whimsical Designs Sneak Peek Day 1! In case you haven't heard the news yet, Stephanie of Whimsical Designs has her own line of stamps coming out! Today all of the Whimsical Designers will be giving you sneak peeks of two sets, and tomorrow peeks of the other two sets. Tomorrow night at 7:00pm EST is the stamp reveal blog hop. All stamps set's will be available for purchase on Stephanie's blog, in her new shop. Here is my project:


I made this super fun card! I cut the drummer girl from Rock Princess at 3.5 inches. I used a white gel pen to do some stitching lines on the drums and added stickles to the heart. I mounted it on pop dots to a square mat that I angled on the card. I used Whimsical Designs Whimsical Fun Vol.1 for the Live Out Loud sentiment and stamped it on the mat. I tied a bow around the bottom and added some gems to the corner. I can't tell you how much I LOVE these stamps! They are fabulous!
BLOG CANDY TIME:
All of the designers will be giving away one stamp set for the sneak peek week. I am giving away Everyday Sentiments. In addition Stephanie is giving away the entire release to one person. That is a total of 11 prizes.
In order to be eligible for the prizes above you must leave a comment on all of the designers blogs on both sneak peek days.

Want Two Extra Chances to Win? Post about the two day Sneak Peek and the Stamp Release on


1. On Facebook -come back and leave a comment under the sneak peek post on Whimsical Designs saying that you did

2. On Your Blog-come back and leave a comment on Whimsical Designs saying that you did

You will have until Friday December 2 at 5:00pm EST to leave a comment on the blogs. All winners will be announced during the Stamp Release blog hop Friday night at 7 PM EST.
Please make sure you check out what the rest of the amazing Whimsical Design Team has made! Have a great day and see you back here tomorrow for Sneak Peek Day 2!