Thursday, September 27, 2018

Life Is How You Bake It

Hi everyone! It's my day to post at Jaded Blossom and I am sharing this baking favor bag I made using my Jaded Blossom supplies.


I started this project with a 5X7 Zip Closure Bag that I filled with cookie cutters, a spatula, and a roll of Smarties that I wrapped paper around and tied close with twine.
I added the topper cut with the Candy Caddy and glued it to the top of the bag.
I cut the bowls from the SVG Cutting Files Kawaii Baking file using my Cameo and added it on pop dots.
To finish, I added the banners cut with the Card Layer Dies 1 and 2, and stamped the sentiment using the Baked With Love stamp set.

I hope you all liked my project for today and thanks for visiting!

Monday, September 24, 2018

School Of Bows Planner Spread

Hi everyone! It's time for my Monday Planner Post.
Today I'm sharing this School Of Bows spread for this week in my Recollections Planner.


I used the School Of Bows kit from Sticker Bloom and printed and cut them with my Cameo.
I added in several stickers I made myself and from Coffee Monsterz Co. along with a washi weekend banner.


I hope you all liked my weekly spread in my planner and thanks for visiting!

Friday, September 21, 2018

Fall Coffee Stamp Release

Hey Everyone! 

It's time for the Fall Coffee Stamp Release Blog Hop!  Here is a link to the STORE, but you can find a link to the release package below too. 


The Design Team has been busy creating some amazing projects with these new stamps! While you're hopping with us today you'll see 2 fabulous projects at each stop!

Check out the Mini Release which includes 3 - 4x6 sets, 1 - 3x4 set and a freebie set!
Fall Coffee Bundle $49.99

Regular Price - $57.99

Free 3x4 stamp for customers that spend $40 or more before Taxes and Shipping! FREEBIE is only available until Sunday 9/23, 11:59pm pst.

MINI COFFEE


BLOG CANDY

1 Lucky Winner will get to pick a stamp set of their choice!

Just leave a comment on all the blogs along the hop!

The more blogs you comment on the more chances you have to win!


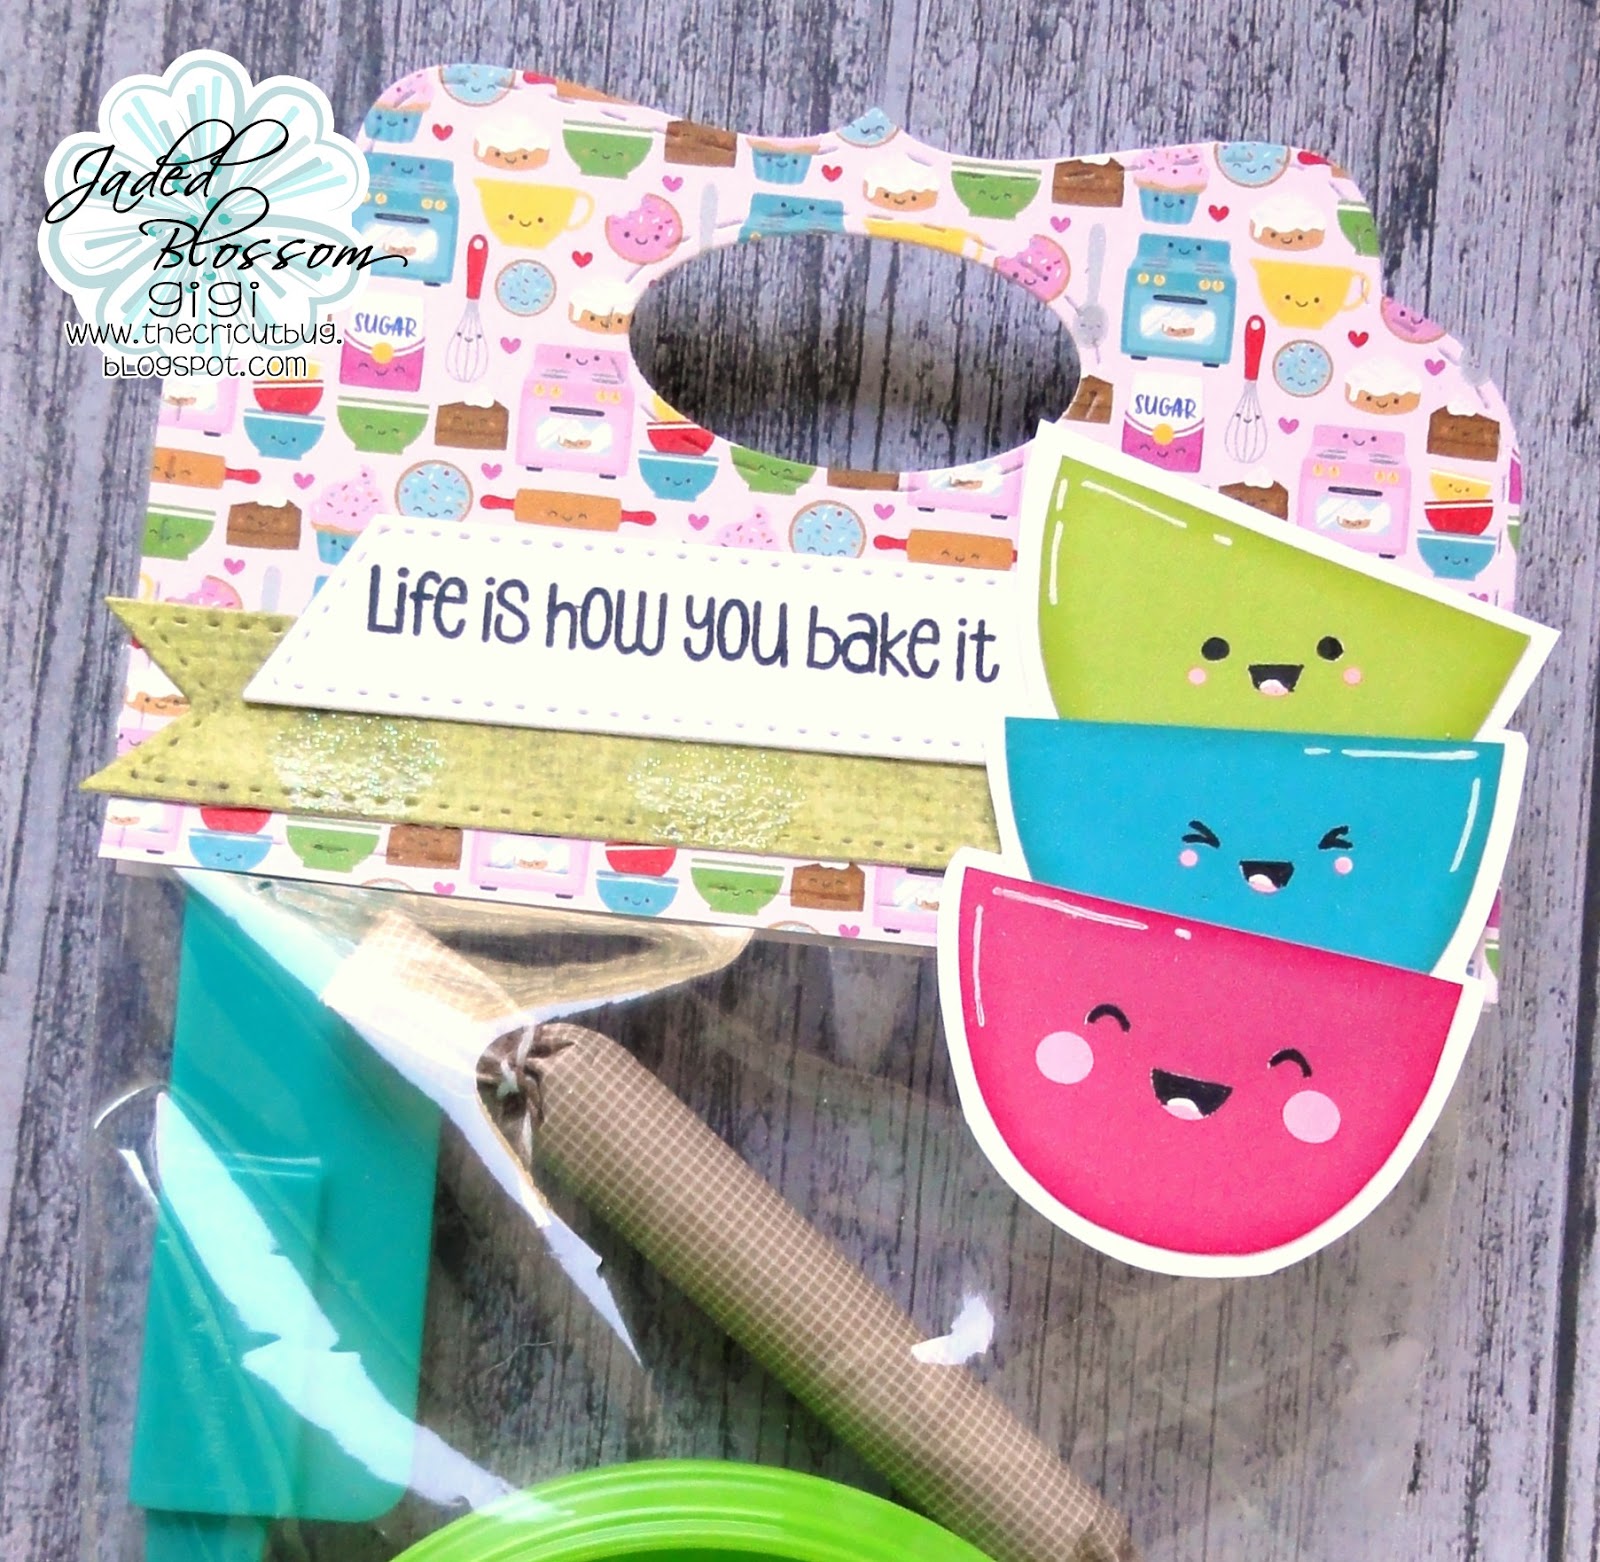
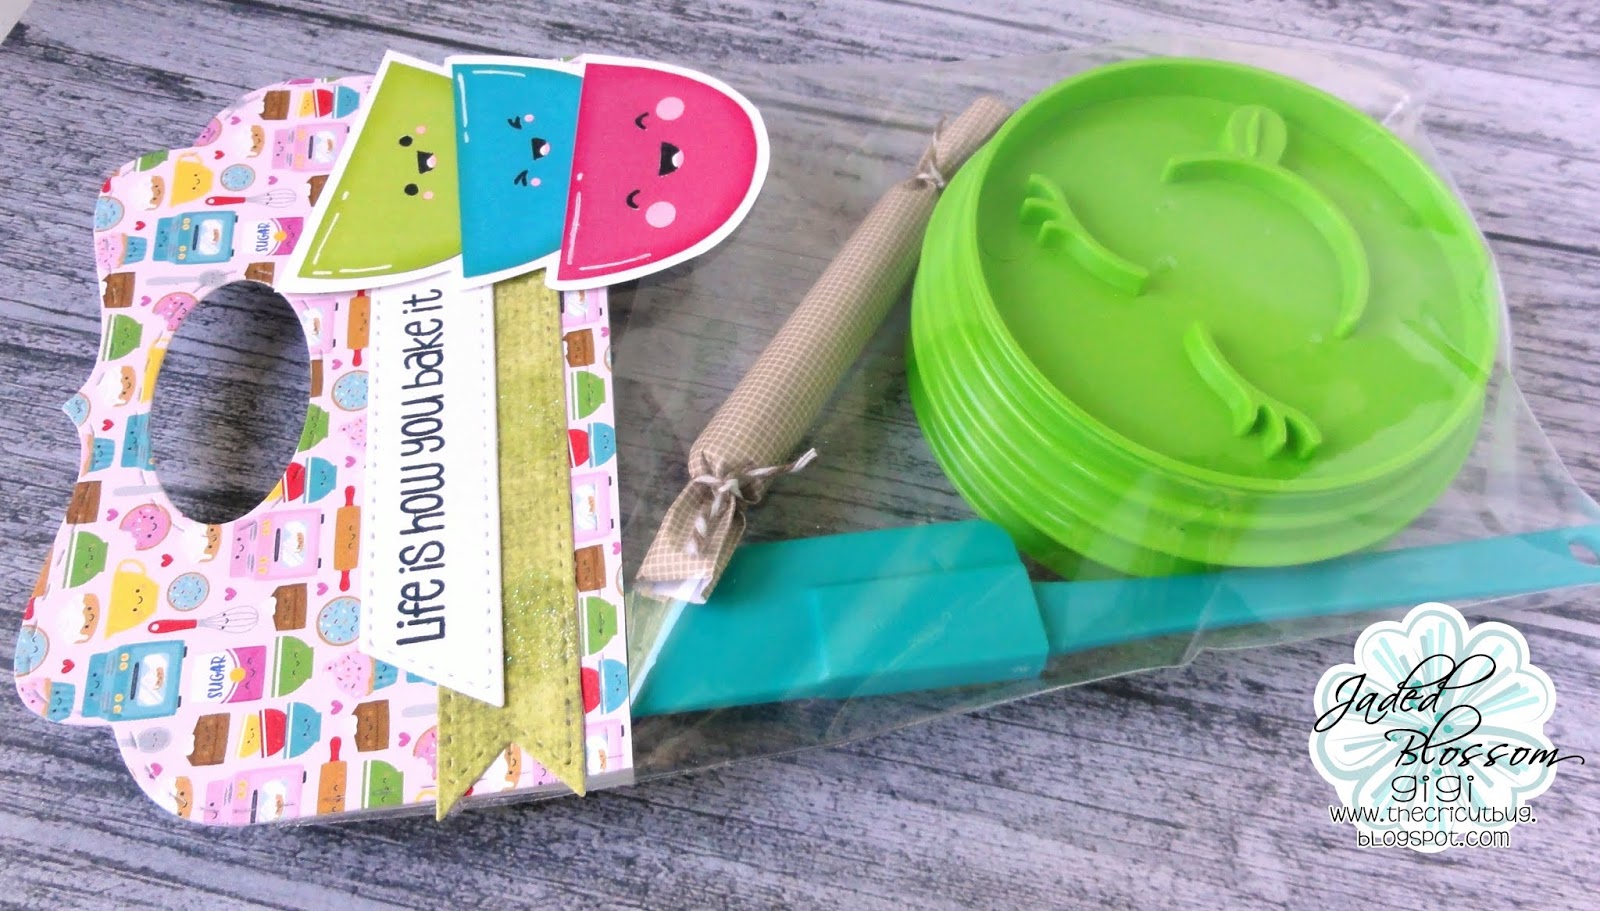
Here's what I created


First up I made this coffee and card set. 
I started with a standard A2 card base and added the mats cut with the Card Mat Dies, Rectangle Dies 2, and Goody Bag Die.
I added some banners cut from the Wine Tag Die and Card Layer Dies 1 for the card and the tag on the bottle was cut from the Card Layer Dies 2.
I half paper pieced/half colored the cups with Copic markers, stamping the large from the NEW Coffee Art and the small one from the Mini Coffee Freebie.
I used the NEW Fall Coffee Art to stamp in the coffee design on the cup in orange. 
I heat embossed the sentiments on the card using the Coffee Art stamp set and Happy Brew Year for the Pumpkin Spice sentiments.


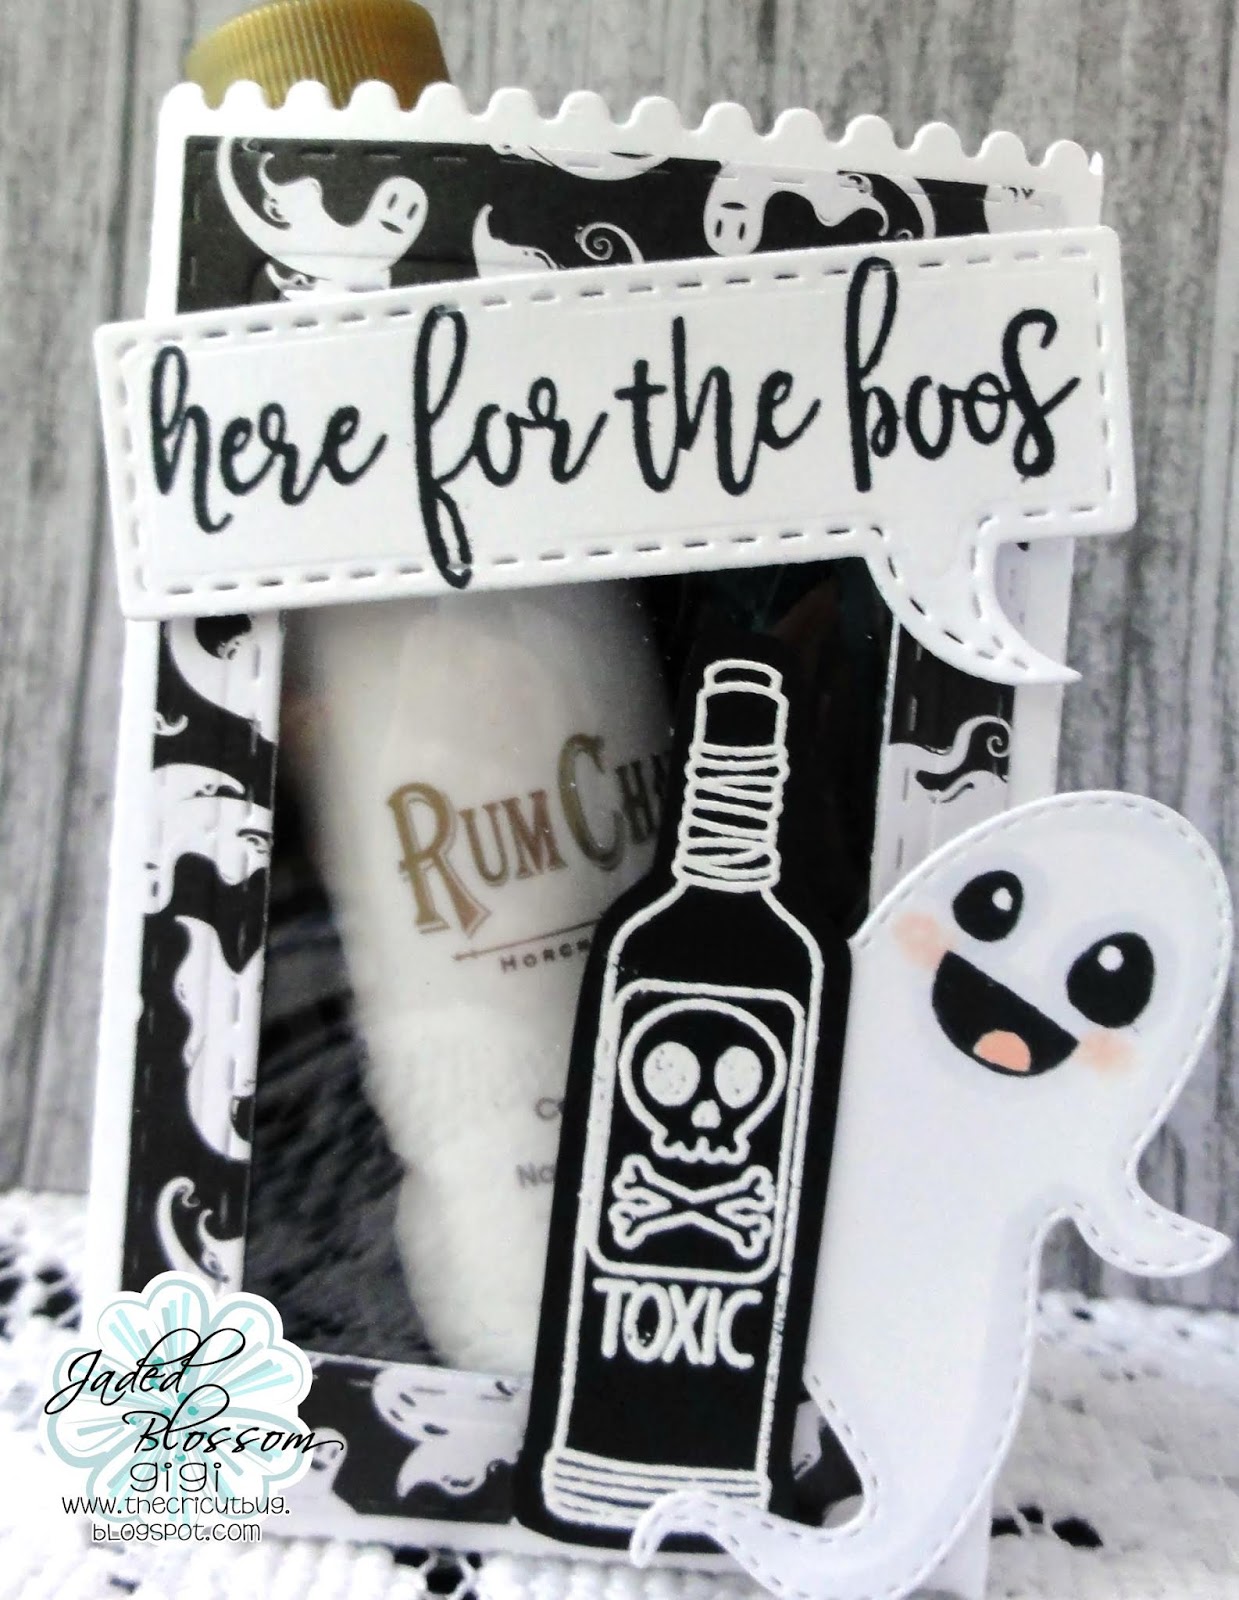
And second I made this "boos" treat bag.
I started this with the Goody Bag Die and cut it out.
I cut the window for the bag using the Rectangle Dies 2 and added some acetate to the background.
I stamped and colored the ghost from the Halloween Dies, stamping the face with the Pumpkin Faces stamp set.
I heat embossed the bottle from the Halloween Tags in white and added it to the ghost's arm.
To finish, I cut the sentiment tag from the Word Bubble Dies and stamped the sentiment from the NEW Wicked Strong Coffee stamp set.  


Next up on the hop is 


Just in case you get lost here is the Entire Line Up:

Monday, September 17, 2018

NEW DoodleBug Planner

Hi everyone! It's time for my Monday Planner Post.
Today I'm sharing this spread using leftover stickers for this week in my NEW DoodleBug Planner.


I have waited MONTHS for this new planner and I'm so happy to finally get it! 
I was only able to get the grid and dots inserts with my NEW DoodleBug Planner so I used the inserts I designed myself and printed them, adding the covers over the top.
I used leftover stickers from a kit that I foiled and added in the character girl stickers I got from a kit from Print Petticoat Bandit


I hope you all liked my weekly spread in my planner and thanks for visiting!


Friday, September 14, 2018

Boolicious Bites

Hi everyone! It's my day to post at SVG Cutting Files and I have a treat box to share. I used the Chibi Halloween Ghost along with the Fry Box Base With Mats.


I started this project with the Fry Box Base With Mats and cut it out using my Cameo.
I cut the Chibi Halloween Ghost out and stamped the eyes using the Peachy Keen Batty Face Assortment.
I added a bag of candy corn to the inside and tied it closed with a ribbon. I added a tag cut with the Card Layer Dies 2 and stamped the sentiment using the Pick Your Poison stamp set.

I hope you all liked my project for today and thanks for visiting!
Have a great day!

Thursday, September 13, 2018

Elephant Themed Baby Shower Invites

Hi everyone! It's my day to post at Jaded Blossom and I am sharing these Baby Shower invitations I made using my Jaded Blossom supplies.


I did these invitations for my Niece's upcoming Baby Shower. Her theme is Elephants and I knew I wanted to use the super cute elephant stamp from the Elephantastic stamp set.
I also decided to personalize the invites a little bit more by stamping the backs of the envelopes too.
I stamped all the elements using several stamp sets that I will list at the bottom.
I colored everything with Copic markers and mounted them to a standard A2 card base.

*** The Misti stamping tool was a true asset to this project!

SUPPLIES
Elephantastic- elephant
Flower Cluster- leaves and dot clusters
Baby Planner- Baby Shower 
Invitations Galore- Date, Time, Place, RSVP
Journal Calendar- Sunday and OCT
Fun Money- Grid and date numbers
Snips and Snails- It's A Boy and You're Invited

I hope you all liked my projects for today and thanks for visiting!


Monday, September 10, 2018

Parisian Planner Spread

Hi everyone! It's time for my Monday Planner Post.
Today I'm sharing this Parisian themed spread for this week in my Recollections A5 Planner.


I used the Parisian printable kit from Paper Crown Planner and printed and cut them with my Cameo.
I added in several stickers I made myself and from Coffee Monsterz Co

I am really happy with how this spread turned out. 
It seemed to be a good spread for the start of September!


I hope you all liked my weekly spread in my planner and thanks for visiting!

Friday, September 7, 2018

Jaded Blossom September Release Blog Hop

Hey Everyone!  Welcome to Jaded Blossom's September 2018 Release Blog Hop.  
Now if you're here from CINDY you're in the right place, if you're just passing through start at the beginning because you don't want to miss a thing.  I also have the complete line up at the bottom.


Here is what I made:
A Witch Fingers nail art favor bag


I started this project with the NEW Paper Bag Die and cut it out along with the mat layer.
I cut the window out using the Card Mat Dies and added a piece of acetate to the back.
I stamped and colored the witch from the Bewitchy stamp set and added her on pop dots and heat embossed the sentiment at the bottom.
To finish, I added some Jamberry Nail stickers, Nail Deco stickers, a file, and a finger spreader to the inside.


Regular Price for the Release Package is $125.99

 Free stamp set for customers that spend $40 or more before Taxes and Shipping! FREEBIE is only available until Sunday 9/9, 11:59pm pst.

FALL FACES

And here is a treat that will be included with every order this weekend. 

BLOG CANDY

1 Lucky Winner will get to pick a stamp set of their choice!

 Just leave a comment on all the blogs along the hop!

The more blogs you comment on the more chances you have to win!


Now on to the HOP....

Next up is TINA


Just in case you get lost here is the Entire Line Up:
Kelli(September Guest Designer)
Michelle

Jaded Blossom September Release Day 5- Pumpkin Picking Treat Bag

Hi Everyone, It's Release Day over at Jaded Blossom!  We hope you all enjoyed our projects this week.  But we still have 1 more stamp set and the freebie stamp set to share with you.

In case you missed any of my projects this week here they are


Monday- Monster Treat Bag
Tuesday- Witch Treat Bag
Wednesday- Wine Bottle Tag
Thursday- Witches Brew K-Cup Holder

Image may contain: drawing

Freebie
No automatic alt text available.

I made this treat bag for today


I started this project with the NEW Paper Bag Die and cut it out in Parchment paper. I usually use wax paper but was out so I used parchment. I didn't realize that NO GLUE will work on parchment so I ended up sewing it with my sewing machine LOL!
Before sewing it closed, I added a mat cut with the Goody Bag Die and stamped the sentiment.
I added a fence with cut with the Halloween Scenic Dies.
I stamped and colored the scarecrow from the Scarecrow Kisses stamp set and pop dotted it on.
I stamped and colored the pumpkin using the NEW Fall Fun stamp set and stamped the face using the Fall Faces freebie.
To finish, I filled the bag with M&M's.


hope you all liked my projects for today and thanks for visiting! 
And make sure to come back Later at 4pm, PST for our Stamp Release Blog Hop!  You won't wanna miss it.

To visit the Jaded Blossom Store HERE
and for Favor Boxes HERE

"Like" us Facebook and share your Jaded Blossom Stamps Creation with us in our Garden of Creativity.

Thursday, September 6, 2018

Jaded Blossom September Release Day 4- Witches Brew K-Cup Holder

Good morning everyone and welcome to Day 4 of the Jaded Blossom September Release. Today we are sharing projects made with a new stamp set!

No automatic alt text available.

I made this K-Cup holder for today


I started this project with the Candy Caddy Die and used a fantastic tutorial for making it into a K-cup holder from my super talented DT mate, Cindy. You can find the tutorial HERE.
I did the inside a little different and cut the circle holders using the Stitched Circle Dies.
I decorated the front with spider and webs cut from the Halloween Dies and the skull cut from the Halloween Dies 2.
I stamped the collage image onto a mat cut with the Gable Box Die from the NEW Halloween Tags and colored it with Copic Markers.
I mounted it to a tag cut with the Treat Tag Die and attached it to the box using a decorative brad.
To finish, I stamped the spider web washi using the Halloween Designer Tapes and cut it out.
I wrapped it around the handle and glued it shut and added the mug stamped from the Halloween Tags.


Thanks for visiting and I'll be back tomorrow for Release Day!
Have a great day!