Showing posts with label Paper Doll Dress Up. Show all posts

Tuesday, June 3, 2014

Peachy Keen June Sneak Peek Day 3

Welcome Back!
Are you enjoying the circus fun so far?
We are having so much fun with this circus themed release!
We’ve shared adorable clowns, sweet elephants, and the Big Top with you so far, and yes, we’ve got more!  What’s a circus without treats?   Popcorn, peanuts,  candy apples and some funny faces to go along with those goodies are what we have for you.  All that AND MORE!   Tonight we introduce you to the Circus Treats and Clown Car and Elephant stamp sets.
Think back to those days of your own childhood as you experienced your first trip to the circus, and ENJOY!!


For this card I used the Clown Car and Elephant stamp set. I just adore this cute faced clown elephant!
I cut the tent using my Cricut and Paper Doll Dress Up. I embossed the background with the Cuttlebug Seeing Spots embossing folder and then cut it around the tent. I layered it onto my card base and cut around that layer also to get the shaped card. To finish the tent, I added twine bows to the sides and stickles to the flags and scallop trim. 
I paper pieced the elephant and added some chalk to her cheeks along with some white highlights. I stamped the sentiment onto a square and matted it in purple. I also poked holes in the corners and added a spike to the bottom to make the sign. 
PRIZES :: PRIZES :: PRIZES!
It’s really easy to get your chance to win the stamp sets you see showcased tonight.  Just leave your comment here, on The Peachy Keen Stamps Blog and on our designer blogs and you’ll get one entry to win for each comment you leave.  The lucky winner will be announced tomorrow on the Day #4 Sneak Peek post on the PKS Blog.  GOOD LUCK!!!
So glad you could join us tonight!  One more day of sneak peeks until the BIG RELEASE AND REVEAL BLOG HOP on the 5th!

Monday, October 14, 2013

Halloween Hanging Easel Card


Hello everyone! It's time for a new challenge at My Craft Spot! This week the challenge is 3D Halloween. Create a 3D Halloween project.
I decided to try this hanging easel card and I have to say, it turned out pretty neat! It was alot of work though LOL!
I created the card and all the cuts using my Cricut. I started with an easel card base and then cut out the decorative frames from Elegant Edges. After it was cut out, I used the inside oval to trace onto my card base where it folds in half. Then I cut out the oval.
I cut the spider from Mini Monsters and stamped the face with a Peachy Keen Erkle and Merkle face. I punched a hole into the top and added some cotton string. I then layered the string in between the to fancy frames and mounted them around the cut out circle on the card base. 
The spider web on the inside was cut using Paper Doll Dress Up and I mounted it on pop dots. 
I stamped the "Be Spooky" sentiment onto My Craft Spot's Tiny Banner Die and stamped the Happy Halloween onto the inside of the card using the Best Witches To You stamp set. 
I hope you will all play along and please don't forget to check out the rest of the DT's projects!
Have a great day!

Monday, May 27, 2013

Welcome To The Neighborhood


Hello everyone! It's time for a new challenge at My Craft Spot! This week the challenge is "Welcome To The Neighborhood"
I created this house shape card for my project today. I decided to give it LOTS of texture and depth by using several embossing folders and pop dotting layers.
I created the card in my Gypsy by welding 2 houses together from Create A Critter. I embossed the house background using the Tim Holtz Bricks embossing folder and the door with the Woodgrain folder. 
I cut the fence and grass from Paper Doll Dress Up and mounted each layer on pop dots. I added a brad for the door handle and a window box to the window. The circle sentiment was created by using My Craft Spot's Tiny Doily Dies and I stamped the sentiment and flowers from the Stampin' Around Spring stamp set. To finish I pop dotted the roof and added a Toadally Green Crinkle Ribbon bow. 
I hope you all will play along and please don't forget to check out what the rest of the DT has created! Have a great day!

Thursday, May 16, 2013

Peachy Keen and SVG Cutting Files Blog Hop


Hello everyone and welcome to the Peachy Keen and SVG Cutting Files Blog Hop! If you came from Julie (aka Cricut Chick) then you're in the right place. If not, you'll want to start at the SVG Cutting Files Blog so you won't miss a thing! 

Our goal for this hop is to show just how perfect a match the super cute SVG Cutting files and Peachy Keen stamps go together! So with that being said, here is what I created!


I created this fun pocket card with a seed packet on the card inside.
To make the pocket card, you will cut a 4 1/4 X 11 inch sheet of cardstock. Score at 1 1/4 and 5 1/2. Fold the center up and the 1 1/4 inch strip down. Glue down the sides and flap and you have a fun pocket card!
I cut that sweet girl from SVG Cutting Files file called Sunflower Cindy. I stamped her face with a Peachy Keen Moodies face stamp and added some white highlights to her. The seed bag is part of the Sunflower Cindy file and I cut the grass from Paper Doll Dress Up. I stamped the sentiment onto the card using a sentiment from PKSC-16 April 2013 Peachy Keen Stamp Of The Month kit and for the tab on the seed packet card. For the tab on the seed packet card, I only stamped the "Plant Me" instead of the entire sentiment. 

Now for the best part! There are some AWESOME prizes up for grabs in this hop. All you have to do is leave a comment on all the blogs in the hop and you will qualify to win a $35 Gift Certificate to BOTH Peachy Keen and SVG Cutting Files.....EACH DAY! That's a total of $140 worth of prizes!

Thanks for hopping along with us! Your next stop is the VERY talented Candice!
Here is the blog hop list in case you get lost along the way

Annie - SVG Cutting Files Blog - http://www.svgcuttingfiles.blogspot.com/
Cassandra Cauble - http://www.ctimz3.blogspot.com/
Julie Kauffman (Cricut Chick) - http://cricutchick.com
Gigi McKellips - http://www.thecricutbug.blogspot.com/....YOU'RE HERE
Lorie Souther - http://www.thinkinspot.com/
Peachy Keen Stamps Blog - http://www.peachykeenstamps.blogspot.com/

Sunday, May 5, 2013

Peachy Keen Release Party Challenge Cards

Hello everyone! Have you seen the NEW stamps at Peachy Keen? All of them are now for sale! Can anyone say CAUUUTE? WOW! I LOVE all of these new sets!

I am sharing a couple of cards that I did for the Release Party challenges going on over at The Peachy Keen Connection. If you play along, you have a chance at winning a Peachy Keen Gift Certificate!


For my first card, this is for the "Flower" challenge hosted by Saundra. You can create anything, just include a flower somewhere on your project. 
I stamped this ADORABLE baby from one of the new sets called Hey Baby. I paper pieced her outfit and colored her with Copic markers. I pop dotted the flower to her hat and heat embossed the same flowers onto the background. I also stamped the sentiment and added some simple banner to the side.


For my second card, this is for Glora's Shape Card challenge.
I cut the barn from Paper Doll Dress Up and stamped the silo with Peachy Keen's Brick Background stamp.   I created my shape card the old fashion way...I cut 2 of the same with one being on blackout, and attached them at the top. I cut out the center door and created a half door for my cow to look out of. I stamped and colored the cow head using the NEW May Peachy Keen Stamp Of The Month kit and just added a rounded piece that I colored a spot onto for his body. To finish, I added the grass and stamped the sentiment.


I hope you all will come play along in the challenges and thanks for stopping in!
Have a great day!

Thursday, May 2, 2013

May Peachy Keen Sneak Peek

WARNING: PICTURE HEAVY POST!
In order to give you the full effect of this box, I took LOTS of pictures!


Hello everyone! I have a project to share that I did with the NEW May Peachy Keen Stamp Of The Month set that is coming out! OMG!!! You all are going to LOVE this cute set! I know I do! LOL!

I created this baby gift box for my project. I started with a store bought hexagon box and covered it with paper. The postage square mats were cut from B Is For Boy and the font was cut from Birthday Bash. The grass was cut from Paper Doll Dress Up and I did a white stitching line around the center squares. 
Those ADORABLE farm animals are from the new Peachy Keen SOTM kit! I stamped and colored them with Copic markers and pop dotted them to the box. 
To finish I made a paper bow, added it to the top and glued ribbon around the top edge of the box. You can find a great tutorial on how to make your own bows HERE. The only change I made was instead of putting it together with glue dots, I punched holes and used a brad to secure the whole thing together.

I hope you enjoyed seeing my sneak peek and if you would like to see more, head over to Peachy Keen where there will be sneak peeks all week long! And don't forget to come to the Release Party at The Peachy Keen Connection on Sunday at 6 pm CST where there will be all kinds of inspiration and prizes to be won!
Have a great day!


Tuesday, April 23, 2013

Day 2 Of My Craft Spot's Release Week


Hello everyone! Welcome to say 2 of My Craft Spot's Stamp Release Sneak Peeks!!! We will be showing you some awesome projects along with prizes everyday, followed by a blog hop on Saturday. So make sure you head to My Craft Spot to see what the prize is for EACH day and some fabulous inspiration from the DT.

Today we are showing Sneak Peeks of the new Cute Critters stamp set. I will say that this set is a must have for all animal lovers!
This was such a fun card to make! I laughed out loud when it was all done because I think it is just SOOO cute! LOL!
I cut the cat and limb from a Lettering Delights file called Love Pets and stamped the face with a Peachy Keen Here Kitty Kitty face. The dog was cut from a SVG Cutting Files set called Dog Gone Cute and stamped his face with a Peachy Keen Happy Go Lucky Dog face. 
The grass was cut from Paper Doll Dress Up and the tree I created by cutting a strip by hand and inking it with distress ink. To finish I stamped that super fun sentiment using the new Cute Critters stamp set. 

Thanks for stopping in today and don't forget to head over to My Craft Spot for more sneak peeks, wonderful inspiration and the prize for today! See you tomorrow for day 3!
I am going to enter this into the SVG Cutting Files challenge which is Fur Babies.

Thursday, March 28, 2013

Happy Spring


Hello everyone! Today is my day to post over at My Craft Spot and I have a cute card to share with you!

The bunny was cut using my Cameo and a file from the Silhouette store. I stamped the eyes with some Peachy Keen face stamps and did a white stitched line around the card. The grass was cut from Paper Doll Dress Up and I rounded the corners of it to fit with the mat. I stamped the sentiment using My Craft Spot's Butterfly Kisses stamp set onto a banner and punched holes in the sides. I then wove the Todally Green crinkle ribbon through the sentiment banner and secured it down with tape. To finish I added the bow to the corner. 
Thanks for stopping in and have a great day!
SUPPLIES
My Craft Spot- Butterfly Kisses stamp set and Todally Green Crinkle Ribbon
Peachy Keen- The Cornies Faces
Cricut- Paper Doll Dress Up
Cameo

Friday, March 22, 2013

Hoppy Easter


Hello everyone and happy Friday! I am SO sick of winter! It has been SO super cold here. We have been lucky if it hits 40 degree's...which it hasn't in almost 2 weeks. IT'S SPRING for pete's sake! LOL!

I have a card to share today that I made for Easter. I know alot of you like to see my Cricut creations and I will keep alternating with my Cricut and Cameo. I just had to create something with this adorable chick from Create A Critter 2.
I cut the card base from Birthday Bash and the grass from Paper Doll Dress Up. The eggs were cut from Doodlecharms and I hand cut one in half to make it look like it cracked. The chick was cut from Create A Critter 2 and I stamped the face with a Peachy Keen's Winter Wonderland face stamp. The bunny hat is the accessory for this cut. To finish I used My Craft Spot's Tiny Doilies Dies to create the sentiment flower and stamped the sentiment using Peachy Keen's Baby Easter Bunny stamp set. 
I hope you all like my card and thanks for stopping in. Have a wonderful weekend.

I am going to enter this card into the following challenges:
BBTB2- Egg-ceptional Easter Eggs
Craftin Desert Diva's- Easter Eggstravaganza

SUPPLIES
                       PK-193 Baby Easter Bunny
My Craft Spot- Tiny Doilies Dies
Cricut- Birthday Bash, Paper Doll Dress Up, Create A Critter 2, Doodlecharms


Thursday, March 14, 2013

St. Patty's Day Treat Box


Hello everyone and Happy Friday! It's time for a new challenge at Peachy Keen! This week the challenge is "Anything Goes"! 
I decided since this weekend is St. Patrick's Day, I would make this fun treat container. I saw this cute box on Pinterest, but it called for the use of the Top Note Die. I don't own the Top Note Die, so I created one using my Cricut.  I will also give you the instructions on how to make one yourself.

To make the box I used the Top Note Die cut from Elegant Edges. They measure 5.27 X 3.75 and welded two of them together for the total length being 9.46. It will look like this:


Score the cut Top Note Die cut at 3 1/4 and 6 inches.
Create the center box by cutting a 4 1/4 X 4 1/2 inch square and score at 3/4 on all four sides. Trim in to the ends on 2 sides to create tabs and fold box together. It will get mounted to the center between the 2 score marks on the Top Note die like this:


Before I mounted the center box, I embossed the outside of the box using Peachy Keen's Grandma's Bathroom Floor background stamp and heat embossed it in white. Then I assembled the box.
 For the front, I cut a circle and shamrock using my Cricut and stamped the face with a PK Erkle and Merkle face stamp. To close the box I used a hole punch and punched a hole through both layers.  I stamped the sentiment from PK's Kiss Me Leprechaun and attached it with a glitter brad securing the box closed through the punched hole. I added a bow and glued it to the circle tag and then glued it to the top of the box. To finish I added some Peanut Butter Lindor Truffles on the inside of the box.
I hope you all liked my project and will play along this week! Please don't forget to check out what the rest of the DT has created! Have a great day!

SUPPLIES
Peachy Keen- Grandma's Bathroom Floor
                       Kiss Me Leprechaun
                       Erkle and Merkle Face Assortment
Cricut- Paper Doll Dress Up and Elegant Edges

Wednesday, March 6, 2013

Easter Basket and Tutorial


Hello everyone! Have you seen the NEW stamps from Peachy Keen yet? HOW CUTE ARE THEY?!?!?! I just LOVE all the bunnies in these new sets!
I made this Easter basket for 1 of the 2 challenge at the Peachy Keen Connection site. If you missed the release party last night, you still can come play along in the challenges for some awesome prizes!
This challenge is to create your own background. I stamped the background with one of the NEW PK stamps called Brick Wall Background. I think it has an awesome basket weave look to it!
I stamped and colored the bunny and eggs and added the sentiment frame with the sentiment. I cut the grass from Paper Doll Dress Up and added it to the bottom of the basket. 

To make the basket, I used my Cricut and Doodlecharms. I will give you a quick tutorial on how to make it. 
I cut 2 baskets from Doodlecharms at 8 inches using the blackout cut. I also opted to cut a 3rd one just for the rim of the basket and trimmed off the rest. 
Cut a 3 X 11 inch piece of cardstock and score 1/2 in on each side down the 11 inch side. Then turn and score at 3 1/4 and 7 3/4. After it's score you will cut triangles into where the center score marks meet. It should look like this

After the center is scored and cut you will assemble the basket. I used Score tape for a secure hold. You will add score tape to each of the 6 tabs on the outside. Peel of the tape backing and with one side, center it across the bottom of the basket just above the bottom rim. It will look like this
'
Then add your back piece and your basket is complete!
I hope you all liked my project today and thanks for visiting! Have a wonderful day!

SUPPLIES
Peachy Keen- 
PK-193 Baby Easter Bunny: Bunny and sentiment
PK-191- Easter Eggs: Eggs
PKSC-15 March 2013: Flourish Frame
Cricut- Doodlecharms and Paper Doll Dress Up

Saturday, March 2, 2013

Peachy Keen Sneak Peek!


Hello everyone! Are you ready for some Peachy Keen CUTENESS? The new stamps coming out are going to make you SO HAPPY! 
I am sharing a sneak peek project with you that I did with the NEW March Stamp Of The Month Kit being release on Tuesday. If you would like to see more sneak peek projects, head on over to Peachy Keen.
I started this project with an Easter Basket that I purchased from the $1 Store. I cut the grass with my Cricut using Paper Doll Dress Up and used a crimper to give it the edged lines in it. I stamped and colored the bunny, flowers, and sign from the PKSC-15 March SOTM kit. I hand cut them all out and mounted the flowers, sign, and bunny on pop dots.

Head over to the Peachy Keen Blog to see more of these super cute sneak peeks all week long! And come join in the fun on Tuesday March 5th at 6 pm at the Peachy Keen Connection for the full release party! There will be lots of inspiration, challenges, and prizes to be won!
Have a great day and thanks for stopping in!

Thursday, February 14, 2013

Peachy Keen Sketch Challenge


Hello everyone! It's time for a new challenge at Peachy Keen! This week the challenge is a sketch...you can create anything you want as long as it is based on the sketch above. 
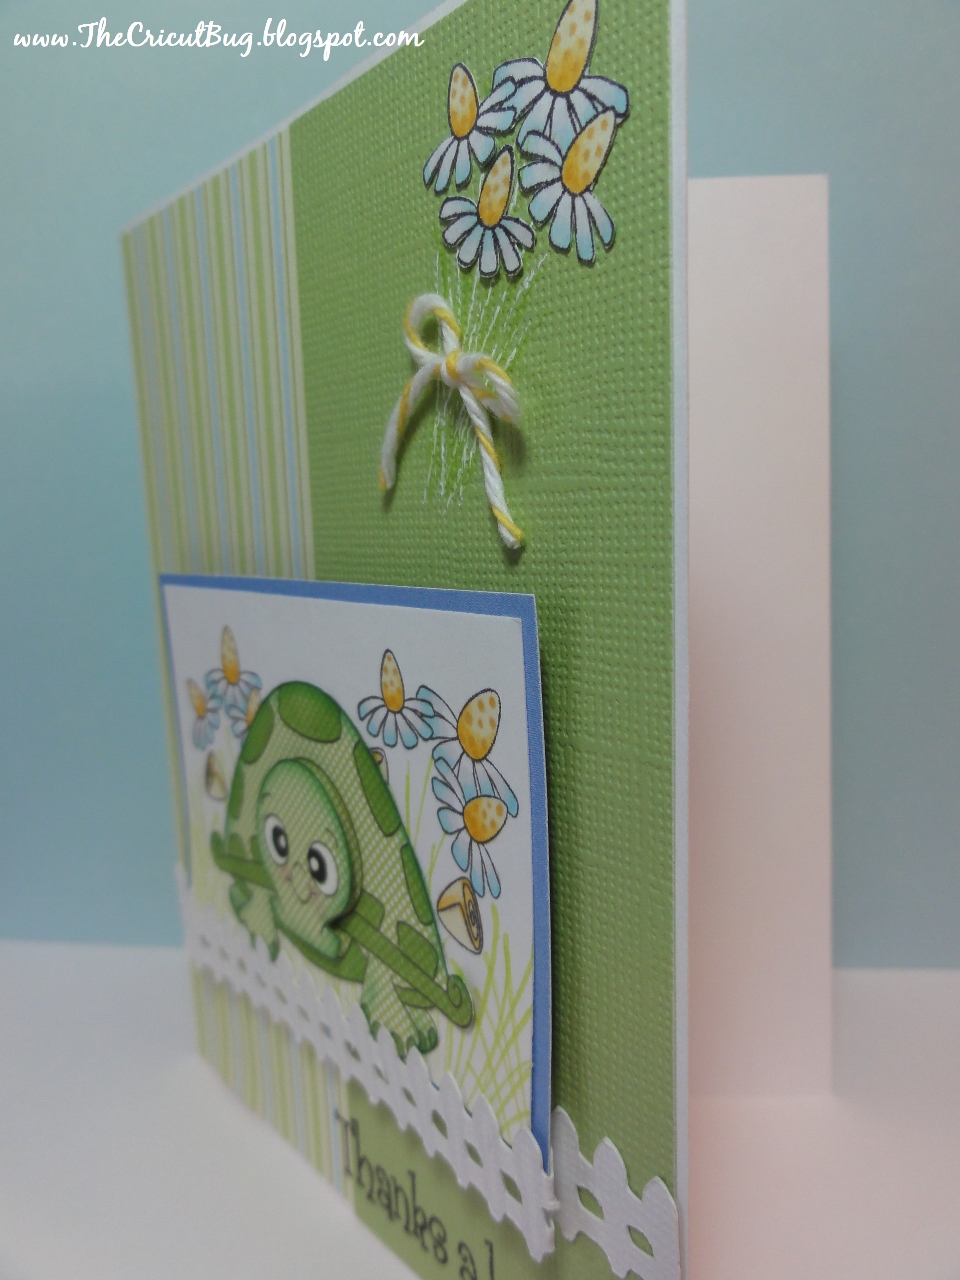
I made this fun card. I can't wait for spring and this card just brings a smile to my face. 
I paper pieced the turtle and flowers from the Peachy Keen June 2012 Stamp of the Month kit. I stamped the turtles face with the NEW Erkle and Merkle faces. These faces are just AWESOME! I LOVE them! I pop dotted the turtle's head for more depth and colored the flowers in the background at up top with Copic markers. I also added a picket fence which was cut from paper Doll Dress Up and I pop dotted the mat and folded the fence around. To finish I stamped the sentiment and added some twine to the flowers. 
I hope you all will play along and please don't forget to check out the rest of the DT's amazing projects. 
Have a great day!

Supplies
Peachy Keen- PKSC-06 June 2012, 
PK-180 Erkle and Merkle Face Assortment