Showing posts with label Simply Charmed. Show all posts

Monday, July 8, 2013

Happy Birthday Cupcake!


Hello everyone! It's time for a new challenge at My Craft Spot! This week the challenge is "Wrap It Up" -packaging, gift boxes, bags, etc.

I made this cute Birthday Gift bag for my project. 
I cut the bag using a file from The Silhouette Online Store and added some Sheer White Ribbon to the top. I did this by using my ATG gun and ran some tape along the top edge. Then I took some Sheer White Ribbon and folded it back and forth over the glue. 
The cupcake is cut from Simply Charmed and I stamped the face with a Peachy Keen Sweet and Innocent face. I also added some Glossy Accents to the cherry and dotted it on the cupcake for sprinkles. 
I made the tag and stamped the sentiment using My Craft Spot's NEW Tasty Treats stamp set and attached it to the handle using more Sheer White Ribbon.

I hope you will all play along and please don't forget to check out what the rest of the DT has created! Have a great day!

Saturday, January 19, 2013

Fruit Trio


Hello everyone! I wanted to share a really quick and simple card set that I made. These are all the same design, just different images and sentiments, which makes them really quick. 
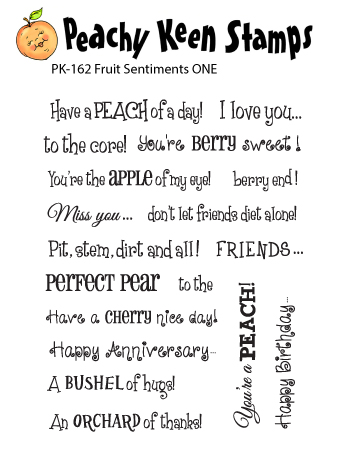
Each cards lacy circle mat was cut using the Lacy Circles Nestibilities Die. The apple and peach were cut using Wild Card 2 and the strawberry was cut from Simply Charmed. I stamped the faces with Peachy Keen's Piles Of Smiles 1 inch faces. The sentiments are all stamped from the NEW Fruit Sentiment One and I put them on a simple banner. To finish each card, I added a button with a twine bow. 

I hope you all liked my quick card set and have a wonderful day!
GiGi

Monday, October 8, 2012

Spooky Pull Up Treat Holders


Hello everyone! It's Monday which means a new challenge at My Craft Spot!
This week the challenge is "A Treat For You" something to go with the gift of food.
I made these pull up treat holders. I have had this idea for a long time and decided to finally make them. They are so much fun! When you pull on the bow, the treat comes sliding up on a tag. They are based off of the Hershey bar pull up treat holders, but smaller. You can see a great video tutorial HERE. I will also give you the measurements of the smaller ones I did.
I cut my base 4 X 9 and scored it at 3 and 6 inches. Fold over each side and glue sides including the bottom. The tag is cut at 3 3/4 X 2 7/8. Measure enough ribbon to go around the entire tag and more to tie a bow. I simply used my ATG tape to secure the treats to the tag.
The fronts were decorated with the following:
The Pumpkin: I used the face from one of the pumpkins in Mini Monsters and did a black faux stitching line around the outside.
The Bat: I added large google eyes, drew the mouth with a white pen, hand cut triangles for the teeth and the bat wings are from the bat in Simply charmed that I glued to the back.
The Mummy: The is just strips of paper that I inked and also added large google eyes.
All of my treat holders I added stamped sentiment tags to using My Craft Spot's Ghostly Greetings stamp set.
I hope you will all play along and please don't forget to check out the rest of the great projects!
Have a great day!
SUPPLIES
My Craft Spot- Ghostly Greetings Stamp Set, Deep Purple, Toadally Green, and Smokey Black Crinkle Ribbon
Cricut- Mini Monsters and Simply Charmed

Saturday, September 8, 2012

My Craft Spot Stamp Fall Release Blog Hop

If you click on the above picture, you can see it a lot bigger.


Hello everyone! IT's FINALLY the day you get to see the full reveal of the new stamps! If you came from My Craft Spot, you're in the right place. If not you will want to start at the beginning at My Craft Spot so you won't miss a thing! You can also see all the new stamp sets there too!
I made this awesome Halloween banner using the new Tiny Doilies Dies, Stampin' Around Fall, and the Spooky Treats Stamp sets for my project.
The banners were cut from Straight From The Nest at 7 inches. I used my sewing machine and sewed a zig zag stitch along the sides of the orange banners. I cut the witch's head out of chunky glitter paper from Happy Haunting. For the center banner I cut the frame from Happy Haunting and used my Gypsy to make it a little wider to accommodate the sentiment. I stamped that awesome sentiment from the Spooky Treats stamp set.
NOW, for the layered ornaments.....I saw something like this on Pinterest and LOVED it. Theirs (can be seen HERE) was made using Stampin' Up stamps and dies, and I set out to re-create one using my Cricut! This is a very time consuming project, but so worth it! I will give you a list of the cuts and quantity and then tell you how to assemble it.
Simply Charmed ornament- 15 at 2 1/2 inches out of white (cut off hanger) for each ornament- 30 total for 2 ornaments
Jolly Holidays- 15 at 2 inches out of black and white poka dot for each ornament- 30 total for 2 ornaments
Here is a cut out sheet for you to see as reference
I chose to stamp my orange and white ones, but you can easily do this with just pattern paper.
Fold all ornaments in half length wise. Assemble each petal by gluing 3 ornaments together. Here's what they will look like
When you get all of your petals assembled, you will glue them to the outside of a 3 inch circle
(these are shown is reverse colors)
Next you will cut a 1 1/4 X 12 inch strip of paper and score every 1/4 inch till the 12 inch end. Then fold back and forth on each other to create the pleated fold for the rosette center. Glue ends together and ink edges in black. Then glue rosette to a 1 inch circle. For the center of the rosette I used My Craft Spot's new Tiny Doilies Dies and layered them on top of each other. I stamped the center die with the pumpkin stamp from the Stampin' Around Fall stamp set and did a black stitching line. I glued them to the top of the rosette and pop dotted the rosette to the center of the circle using 3 pop dots layered on top of each other.
I thread all the banner pieces onto black yarn and tied Marmalade and Midnight Black crinkle ribbon in between each banner.

Now for the BEST part! Each one of us is giving away 1 one the new stamp sets! All you have to do is leave a comment on all the blogs through the hop, and that will give you a total of 9 chances!
 I am giving away the Tiny Doilies Dies!

Just leave a comment and you will be entered to win. We will announce all the winners on Monday September 10.
Now you're off to the very talented Robin!
Here is the hop order in case you get lost
Kimberly
GiGi  -You're Here!
Robin
Kate
Amber
Heather
Gwen
Ally 
Marlene
Have a great weekend and thanks for hopping along with us!

Wednesday, August 29, 2012

Wish BIG!

How much fun is that face!!! It looks like she's wishing REALLY hard! LOL!


Hello everyone! This is a card that I made for a friend. I used the sketch from the Peachy Keen challenge as my inspiration for this card.

I cut the ladybug from Simply Charmed and stamped the face with a Peachy Keen face. I added Glossy Accents to the antenna, glasses, and heart and did a white stitching line. The banner I made by using the Tiny Tag Dies with simple triangle pennants over the top. I added stitching lines to the pennants and some twine. I stamped the sentiment from Tiny Tags, punched it out with a Fiskars punch, and mounted it with pop dots. I also finished the inside by adding a strip of matching paper and stamping the sentiment.
I hope you all enjoyed seeing my card and thanks for stopping by. Have a great day!
SUPPLIES
Peachy Keen- August SOTM
Cricut- Simply Charmed
Glossy Accents


Friday, July 6, 2012

Happy Pig!


Hello everyone! Did you all have a nice 4th of July? We were supposed to camp, but with the SUPER hot heat here in WI, we ended up just coming home. :(   If I have to be stuck indoors, at least I can play in my craft room! LOL!
I made this card for the Peachy Keen Stamp Release Party challenge. The challenge for this one is to "Create A Scene". I missed the release last night, but wanted to play along with the challenges. Any excuse to use my PK stamps! LOL!
I just got the County Fair cart and had to play with it. The pig and fence are cut from there. I stamped the pig's face with a PK stamp and did some inking on him. The sun was cut from Simply Charmed and I also stamped her face. The background clouds were stamped and I cut an extra cloud out and pop dotted it to the  card. I stamped the sentiment and butterfly from My Craft Spot's Butterfly Kisses stamp set. 
I hope you all like my card and thanks for stopping by. Have a great day!
SUPPLIES
My Craft Spot- Butterfly Kisses Stamp Set
Peachy Keen Stamps- Cloud Background, Happy New Year Assortment, Critter Faces Medium
Cricut- County Fair, Simply Charmed

Saturday, June 30, 2012

Have A Fabulous Birthday!


Hello everyone! Here is the card that I made for a couple of challenges. I used the Peachy Keen color challenge this week.
I cut the cake from Simply Charmed and stamped the face with a PK Happy Lashes face. I did some doodling on it and also used Prismacolor markers for the dots on the frosting. For the banner, I hand cut some triangles and added some twine to the top. To finish I added a black doodling line around the outside mat, stamped the sentiment and mounted the cake to an action wobble. 

SUPPLIES:
My Craft Spot- Birthday Wishes Stamp Set and Pink Sorbet Twinery twine
Peachy Keen- Happy Lashes 
Cricut- Simply Charmed

I am also going to enter this into Celebrate The Occasions challenge which is "Birthday"
Thanks for looking and have a great weekend!

Monday, June 25, 2012

Guest DT at Fantabulous Cricut


Hello everyone and Welcome to the Cricut Bug! Today I am guest designing at Fantabulous Cricut! The challenge this week is "BBQ Time!"
I made this super fun card! I cut the hamburger from Simply Charmed and stamped the face with a Peachy Keen face stamp. I did lots of inking and used white and black pens for the details. The ketchup and mustard bottle's were cut from Everyday Paper Dolls and I stamped the faces with PK face stamps.  Don't you just LOVE those licking faces?!?! LOL!
I cut the tag from decorative paper from the DCWV Kitchen stack and matted in red. I tied red and yellow twine around the card and attached the tag to it and added a bow.
Thank you so much for stopping by today and I want to give a BIG thank you to the ladies at Fantabulous Cricut for having me Guest DT for them this week! Have a great day!

Supplies:
 My Craft Spot- Lemon Drop and Maraschino Twine
Cricut Carts- Simply Charmed and Everyday Paper Dolls
Peachy Keen Stamps- Cherub Face Assortment
DCWV Nanna's Kitchen Mat Stack

Tuesday, April 10, 2012

Wish Big!


Hello everyone! Here is the card that I made for Peachy Keen's sketch challenge. Before I get into the details of my card I just want to give a BIG shout out to Peachy Keen! I won the grand prize for the April Release challenges and I want to say THANK YOU PEACHY KEEN!!! You ROCK and so do your stamps! I am SO excited that I can buy more of your super cute stamps!
I made my card by following the sketch above. The cupcake was cut from Simply Charmed and I stamped the face with a face from the Happy New Year Assortment. (This is one of my all time favorite faces!!! Hee Hee!) I colored the face with Copic markers and used a white gel pen for the highlights. I inked all the edges of my cuts and I did a faux stitching line around the card and mat.. The banner I cut by hand and stamped the letters, including the "BIG" at the bottom. To finish I added a ribbon, some twine on top of the banner, and some bling.
I am also going to enter this into the Go Fish Challenge.
Thanks for looking and have a great day!

Friday, April 6, 2012

Peachy Keen April Release Challenge #1


Happy Friday everyone! Here is the fun card that I made to enter into the Peachy Keen April Release challenges. There is 2 challenges. The first one is to use the color peach and the second is a sketch. You can find them on the PK Connection.
This card is for challenge #1- use the color peach. I cut the popsicle from Simply Charmed and stamped the face with a Cornies face stamp. You can't really see in the pictures, but I also covered the whole thing with Glossy Accents. I did a faux stitching line around the card and mat and added the BIG pink bow. Gotta love that bow! LOL! To finish I stamped the sentiment which is from Whimsical Designs Whimsical Fun Vol. 1.
I hope you all liked my card and thanks for looking! I will be back for the 2nd challenge project sometime this weekend. Happy Easter everyone!

Sunday, March 25, 2012

Happy Hello


Good morning everyone! Here is the card that I made for Peachy Keen's Just Card's Faux Stitching challenge. I had so much fun making this card and I just LOVE how cute it is. Then again, anything with a PK face is cute to me! LOL!
I used my Imagine and Loris Garden for all the colored paper in this card. The bunny was cut from Simply Charmed and I hid the entire face to just make it a plain bunny. I stamped the face with a Peachy Keen Wide Eyed and Bushy Tailed face stamp and did a faux stitching line around him. I also used colored pencils for the highlights on the carrot. The sun was cut from Smiley Cards and I stamped the face with a Peachy Keen Happy Lashes face and added a faux stitching line around him as well. The grass and fence were cut from Paper Doll Dress Up and I hand punched the flower. I used a black and white pen for the centers on the flowers and did a faux stitching line around the entire card as well as the sentiment tag. The sentiment is from Whimsical Designs Everyday Sentiments.
I hope you all like my card and thanks for looking! Have a great Sunday!