Wednesday, May 30, 2012

Koala Birthday


Hello everyone! I have a fun card to show you today that I did for a couple of challenges.
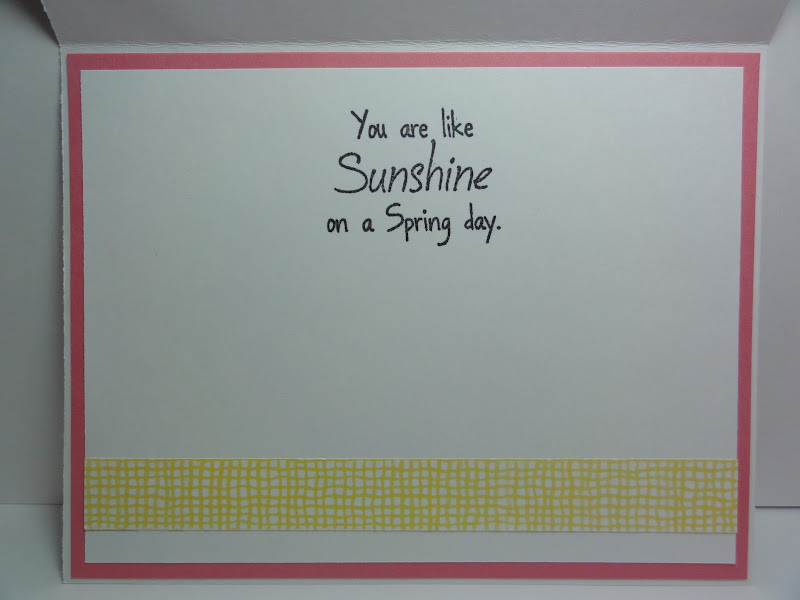
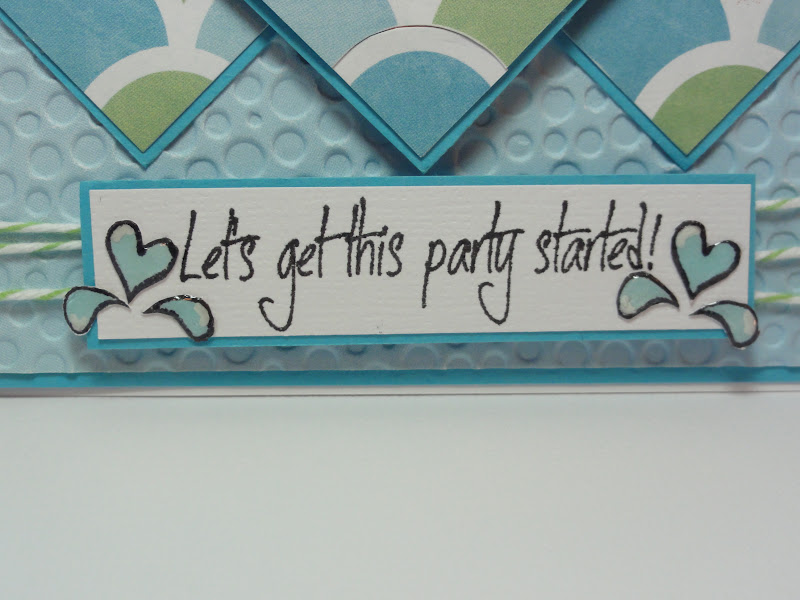
I cut the Koala bear from Create A Critter and stamped the eyes and mouth. The hat is also from CAC and I made a twine pom pom for the top of his hat. The blue background mat and white banners were stamped with a flower stamp that is from My Craft Spot's Butterfly Kisses set. The gray banners I also stamped with a Stampin'Up poka dot stamp. To finish the card I stamped the sentiments on the front as well as the inside. I also stamped more of the flowers across the bottom on the inside.

SUPPLIES
My Craft Spot- Birthday Wishes and Butterfly Kisses stamp sets, Blueberry Trendy Twine
Peachy Keen- Cornies

I am going to enter this into the following challenges
Die Cuttin Diva's- Anything Goes
Celebrate The Occasion- Anything Goes
I hope you all like my card and thanks for looking! Have a great day!

Monday, May 28, 2012

Hello Sunshine!


Hello everyone and Happy Memorial Day! It's time for a new challenge at My Craft Spot! This time the challenge is "Buttons and Bows". Create a project and include buttons and bows on it.
My card today has lots of layers! The sun was cut from Doodlecharms and I stamped the face with a PK face stamp. I cut the fancy frame from Elegant Edges and the flowers from Mother's Day Bouquet. I added a triple twine bow and stamped the sentiment. I also added buttons to the card and the centers of the flowers. I finished the inside of the card with matching papers and stamped the sentiment.

SUPPLIES
My Craft Spot- Butterfly Kisses Stamp Set, Divine Valentine Twist Twine
Peachy Keen- Wide Eyed Kids

I hope you all are having a wonderful weekend and thanks for looking. Please don't forget to check out what the rest of the DT has created for your inspiration!

Sunday, May 27, 2012

Grape Card


Hello everyone! Here is the card that I made to enter into Peachy Keen's challenge. This week it is a color challenge. Here is the colors
This was a really hard challenge for me for some reason. I threw out the first card I made! LOL! So this was my second one.
I cut the grapes and leaf from the Thanksgiving cartridge. I stamped the faces with PK faces and used a white gel pen for the dots. The background was embossed and I added a ribbon. To finish I stamped the sentiment.

SUPPLIES
My Craft Spot- Inside and Out Set #2 Stamp Set
Peachy Keen- Cornies
Cuttlebug Seeing Spots Embossing Folder

Thanks for looking and have a great night!

Thursday, May 24, 2012

Grad Card


Hi everyone! The challenge over at Exploring Cricut this week is to use a cart that you HAD to buy and never use. When 3 Birds On Parade came out,  I HAD to have it! And guess what? I have used it ONCE! So this is the cart that I chose to use for this challenge. I even opted to use the font too!
I cut the graduate bird and stamped the face with a Peachy Keen face. The diploma was cut from Everyday Paper Dolls and I added twine to it and the grad cap. I cut the font and shadows and matted them to square blocks. The bottom strip I double matted and stamped the sentiment across the entire bottom. This card turned out so cute, I might just have to use this cart alot more! LOL!

SUPPLIES
My Craft Spot- Birthday Wishes Stamps, and Denim Twine
Peachy Keen- Happy Lashes
Circut Cart- 3 Birds On Parade
Glossy Accents

I am going to enter this into the following challenges
Exploring Cricut- Use that neglected cart
Fantabulous Cricut- "You Did It" Graduation project
Celebrate The Occasion- Graduation

Thanks for looking and have a wonderful 3 day weekend! I'm hoping to be back with a project sometime this weekend, but I don't know for sure. My baby boy is graduating on Saturday...EEK! And we have lots of parties to go to! Enjoy everyone!

Tuesday, May 22, 2012

Happy Thoughts


Hello everyone! I have a card to show you that I did for Peachy Keen's challenge this week. This time it is an Anything Goes and you much use Peachy Keen stamps.
I cut the kitty from Meow and added twine instead of the cut paper for the string. I stamped the face with a PK face and mounted it to an action wobble. It looks so cute when it wobbles...hee hee!  The small ball of string I made by cutting a circle and covered it in more twine. The tag I cut by hand, I stamped the sentiment, and added it with twine.

SUPPLIES
My Craft Spot- Butterfly Kisses Stamp Set, Lemon Divine and Grape Fizz Twine
Peachy Keen Stamps- Wide Eyed and Bushy Tailed

Thanks for looking and have a great day!

Monday, May 21, 2012

Baby Bonnet Card


Hello everyone! It's time for a new challenge at My Craft Spot! This time the challenge is "Congratulations" (think graduation, new baby, new job, etc.) 
I have had the idea for this card for quite awhile. So I decided to finally make it and guess what? I couldn't believe it when I went to look for a baby bonnet on one of my carts that I only had 1 and it was a front view cut! So I did a search and found a total of 2 baby bonnets available on all the carts that are out there! Well needless to say I didn't let that deter me. I ended up creating this bonnet in CCR with using only George and Basic Shapes. I am going to include a picture of the CCR screen so you can see how I did it. 
After I had the basic shape that I wanted, I grouped them and then copied and welded the other to make the card base. I decorated the front by using white crinkle ribbon with a combination of embossing and a punched border. To finish I stamped the tag and added more crinkle ribbon and a button for the ties. I love how this card turned out....just as I saw it in my head! LOL!
I hope you will all come play along and please don't forget to check out what the rest of the amazing DT has created! I can't wait to see what you will create! Have a great day.

SUPPLIES
Sizzix Twizzle Embossing Folder
Fiskars scallop punch

Saturday, May 19, 2012

Baptism Gift Bag


Hello everyone! I wanted to show you all the gift bag that I made for my nephews baptism that is tomorrow. Awhile back I made the card and wanted to make a matching bag for it. The full details for the card can be found HERE.
I took a plain gift bag and dressed it up to match the card. The lamb was cut from Paper Doll Dress Up and the frame from Once Upon A Princess. The cross was cut in the frame and that was from Indie Art. I printed the poem off my computer and added a bow around the bag. I just love that poem and the way this whole set turned out.
Thanks for looking and have a great weekend!
I also wanted to let you all know that Candy from Candy's Craft Corner is having a HUGE giveaway to celebrate her Blogaversary! You don't want to miss this one so go check it out!

Thursday, May 17, 2012

Let's Get This Party Started!


Hello everyone! I think I am in a "fishy" mood! LOL! The last card I did was a fish too so I must be ready for summer!
This is such a fun card, I just love it! I recently bought the Imaginisce Splash Dance stamp sets and couldn't wait to do something with this adorable blowfish. I stamped him and the water splashes, colored them with Copics, and cut them out. I embossed the bottom strip of paper and added some matching paper over the fish's bottom. I added Glossy Accents to all the splashes and the blowfish's eyes. To finish I added some twine and stamped the sentiment. How much fun is that sentiment? It is so cute!
SUPPLIES
My Craft Spot- Birthday Wishes Stamp Set, Green Apple Twine
Imaginisce Blowfish stamp
Tiny Bubbles Cuttlebug Folder
Glossy Accents
Copic Markers

I am going to enter this card into the following challenges
Scrappy Moms Terrific Tuesday Challenge- Summer Vacation
Made Especially For You- Sketch
Thanks for looking and have a great day!

Tuesday, May 15, 2012

Hi There!


Hello everyone! Here is the card that I made for Peachy Keen's Sketch challenge this week.
 I just think this sea horse is adorable and have always wanted to cut her out and do something with it. So here is the card that I came up with!
I cut the sea horse from Create A Critter and stamped her eye with a PK face. The background on the mat was embossed and I tore a piece of paper for the sand. I wrapped twine around the mat and added a tag that I stamped the sentiment on. The blue strip at the bottom I used a border punch on. The bubbles on the side are punched, then I stamped the faces, and added Glossy Accents to them.

Supplies:
My Craft Spot- Kraft Twine, Inside and Out Set #2 Stamps
Cricut cart- Create A Critter
Peachy Keen Stamps- Cornies
Glossy Accents
EK Success scallop punch
Cuttlebug Floder- Tiny Bubbles
Thanks for looking and for all the wonderful comments you all left me for getting on the My Craft Spot DT! You all are the SWEETEST! Have a great day!

Monday, May 14, 2012

EXCITING NEWS!!!


Hello everyone! I have some exciting news to share! I was asked by Kimberly of My Craft Spot to join her amazing Design Team! YAY! I am so excited and honored that she chose me to be on her Design Team. Thank you Kimberly for this awesome opportunity! I can't wait to show you all the fabulous projects I will be making with these stamps and working with her other SUPER talented DT. There is a new challenge up at My Craft Spot every Monday if you would like to play along! I have a card to show you that I did with My Craft Spot's stamps and twine.

Isn't she just adorable?!?! I cut the bamboo and worm from Create A Critter and stamped the face with a Peachy Keen Wide Eyed Kids face. The fancy mat was cut from Elegant Edges and I inked the edges. To finish I added a twine bow to her hair, added Glossy Accents to the eyes, and stamped the sentiment.

Supplies
My Craft Spot- Twisted Lime Twine, Butterfly Kisses Stamp Set
Peachy Keen Wide Eyed Kids
Cricut- Create A Critter, Elegant Edges
Glossy Accents

I am going to enter this into Paper Playtime's challenge which is a die cut bug. Thanks for looking and have a great day!

Thursday, May 10, 2012

Crazy Ribbon Cupcake Card


Hello everyone! I have a fun card to show you today that I did for My Creative Time's Throwback Thursday challenge. The challenge is to make a birthday card using a cart that has balloons, cakes, party hats, cupcakes, etc. I used Straight From The Nest. I never realized until I really looked at it, just how many birthday cuts are on there. 
I made the card shape using Accent Essentials by welding to rectangles together and then adding the scallop borders. The background is embossed with Seeing Spots and I added diamond glitter dots to the scallops. The cupcake was cut from Straight From The Nest and I added lots of fun things to it. I didn't use the wrapper, but instead cut strips of paper and added twine to it. For the top I added Glossy Accents to the cherry and diamond glitter for the sprinkles. I also added that cool fringe and more diamond glitter to the bottom of the frosting. The banner I cut by hand, I stamped the letters, and used a white pen for the inside lines. I added more of that fun trim and wound twine around it. The mini tag was stamped and cut by hand and I added that amazing bow! How fun is that bow?! I found an awesome tutorial for it HERE.
I finished the inside by stamping the sentiments and cherry which are from Peachy Keen's With A Cherry On Top stamp set. I colored the cherry with Copic markers.
I hope you all like my card and thanks for looking! I hope you will come back on Monday because I have some super exciting news to share with all of you!  Have a great weekend!

Wednesday, May 9, 2012

We Make A Great Pear!


Hello everyone! Here is one of the projects that I made this weekend for the Peachy Keen Stamp Release  challenge. For this challenge you were to use at least 2 pieces of fruit in your project.
The fancy frame was cut from Elegant Edges and I did a faux stitching line around the circle. The pears were cut from Potpourri Basket and I stamped the faces with Peachy Keen's Happy Lashes faces. To finish the card I tied a ribbon and stamped the sentiment.
Thanks for looking and have a great day!

Monday, May 7, 2012

Bath Sign


Hello everyone! As I said in my last post, I have another recycling project to show you. It might be considered an upcycling project, I'm not sure! LOL! I could have SWORN that I took a picture of the original frame, but I can't find it anywhere on my camera. This started out as a white washed frame with a poster in the center. I bought it years ago and it was in my living room forever! I just recently re- designed my bathroom and saw a sign like this and thought it would be so cool in my bathroom. So I designed my own!
I started by spray painting the entire thing black. While it was drying I got out my wonderful Gypsy and designed this sign. I used Art Nouveau for the "bath and 5c" and Plantin Schoolbook for the bottom lines. I then cut this whole thing out of vinyl. I have only cut vinyl one other time, so I am pretty happy with how this turned out. I used transfer tape, cut it down to the exact size of the inside of my frame, and applied it to the middle. By cutting the exact size it ensured that it would be centered when I applied it to the frame. And just like that, instant bath art!
I hope you like my new bathroom sign, because I LOVE it! And the best part, it costed me nothing! I had all the supplies on hand. Thanks for looking and have a great day!

Sunday, May 6, 2012

Recycled Soup Can Gift Pail


Hello everyone! I have another recycling project to show you! This time I used a soup can. I am in recycling mode, because I have another fun home decor project that I did and will be posting it this week. This coming weekend in my town is the city wide rummage sale and I can't wait to see what fabulous stuff I can find to re-purpose!
I made this to enter into Peachy Keen's challenge. This week the challenge is to use a recycled soup can.
I started with an empty soup can and added a beaded handle to it. I did this be using a metal piercing tool and punched holes in the sides of the can. I then added some wire, beaded it, and tied it through the hole on the opposite side. I covered the top and bottom 1/3 of the can with twine and the center is a strip of paper that I stamped the word MOM onto. I paper pieced the bee and added it to the can using pop dots. The tag I cut by hand, stamped the sentiment and lips, and tied it on with some ribbon. I am going to put a gift card on the inside, the perfect little gift pail!

SUPPLIES:
Peachy Keen Stamps- Faceless Bugs and Kiss Me Leprechaun
Aqua Blue Timeless Twine
Michaels Mom stamps, sorry I don't remember the brand
Wire, Beads, and Ribbon

Thanks for looking and have a great night!

Saturday, May 5, 2012

Post It Note Holder's


Happy Saturday everyone! I have a couple of Post It Note holders to show you today. I love adding these to gift bags. Everyone can use Post It's!
I followed this fabulous tutorial by Liz at Liz's Paper Loft. You can see the video HERE. These are so simple to make, and oh so cute. I cut the sun from Create A Critter and stamped the face. The ice cream cone was cut from Once Upon A Princess. I only cut one of the scoops and added a chocolate piece that was punched with the MS Drippy Goo Punch. The cherry was stamped and cut out and I added Glossy Accents to it and the chocolate layer. The cone was embossed with an embossing folder and I inked over it to make it stand out.

SUPPLIES:
Cricut Cart's- Create A Critter and Once Upon A Princess
Peachy Keen Stamps- With A Cherry On Top, Happy Lashes
My Craft Spot Butterfly Kisses Stamp Set
Glossy Accents
MS Drippy Goo Border Punch
The Paper Studio Mesh Texture Embossing Floder

I am going to enter these into the following challenges:
1. Simply Crafts-  Create A Critter Sun
2. BBTB2- Ice Cream Cone

Thanks for looking and have a wonderful weekend!